Umail Access (Work in Progress)
There are different ways to access umail. One of the requirements is to use Two Factor Authentication (2FA/DUO). In general, any mail client that supports OAUTH2, in theory should be able to work with Umail. We have been testing and evaluating different methods. The table below represents successful connections to read and send emails through Universtiy Exchange mail server (umail). This is not a comprehensive list. If you would like us to test any speific email client, please make sure to send us a note to This email address is being protected from spambots. You need JavaScript enabled to view it..
| Mac | Linux x86_64 | Windows | Android | iPhone |
|
| Apple Mail | ✓ | ✓ | |||
| Thunderbird | ✓ | ✓ | ✓ | ||
| FireFox |
✓ | ✓ | ✓ | ||
| Chrome |
✓ | ✓ | ✓ | ||
| Safari | ✓ | ||||
| MS Edge/IE | ✓ | ||||
| Windows Mail |
✓ | ||||
| Outlook | ✓ | ✓ | ✓ | ||
| Alpine | |||||
| Blue Mail | |||||
| Pegasus Mail | |
||||
| K-9 |
Note (Linux): CentOS and OpenSUSE were used.
Note (Pegasus): As of October 2021, it does not support OAUTH2. From: http://www.pmail.com/devnews.htm:
"Short version: I am working on OAUTH2 implementations for GMail and MS and will have them out as soon as possible."
You can also find more information on University web sites on how to access Umail.
https://uofu.service-now.com/it/?id=uu_kb_article&sys_id=cbc3f8ae13fceec0ae6d53228144b075
General Mail Client Configuration (OAuth2)
- Incoming server
Server Type: IMAP Mail Server
Server Name: outlook.office365.com
User Name: <unid>@umail.utah.edu
Connection security: SSL/TLS
Authentication Method: OAuth2
port: 993
- Outgoing server
Server Name: smtp.office365.com
User Name: <unid>@umail.utah.edu
Connection security: STARTTLS
Authentication Method: OAuth2
port: 587
Screen shots and examples
Here we have screen shots for some of the methods listed in above table to show step by step process.
- Thunderbird
Either install Thunderbird, or go to account settings to add one.
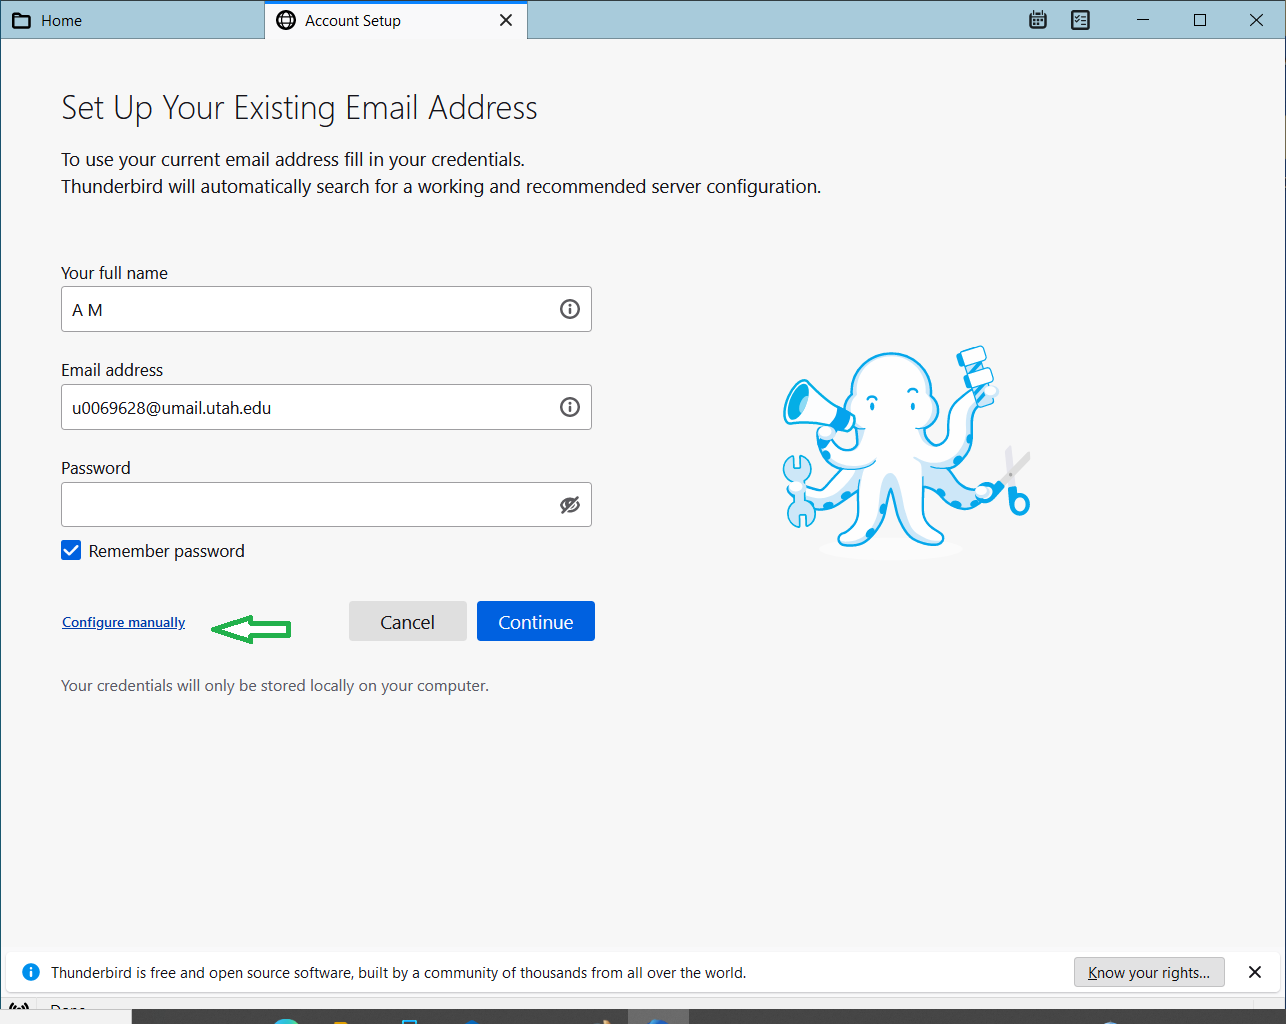
Once you enter email address and password, 'Configure Manually' will show up. Click to configure manually.
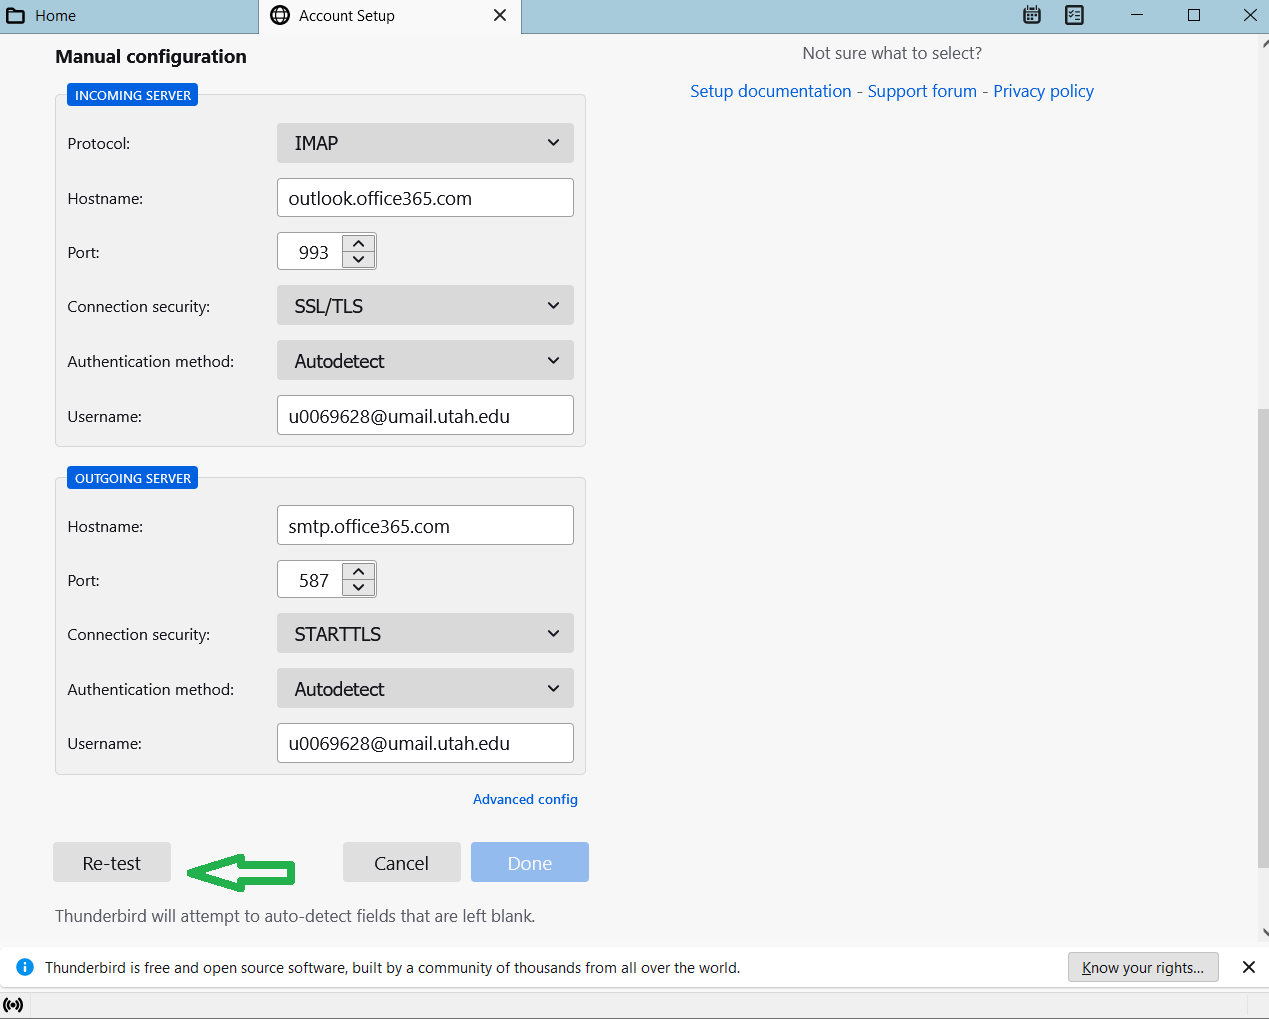
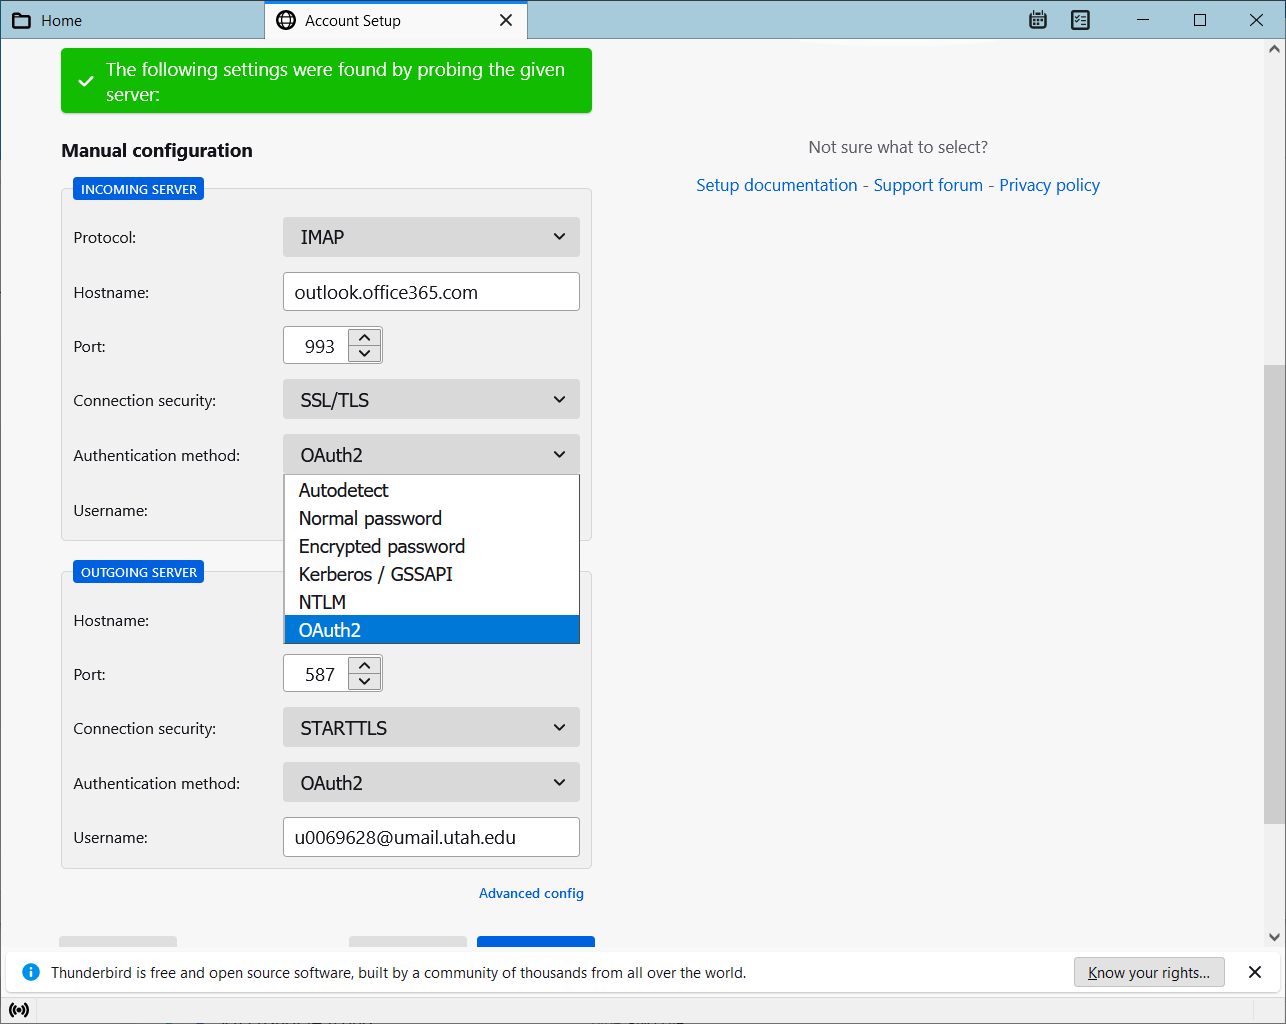
Enter values as shown above for both Incoming and outgoing servers. Please note Authentication method is set to 'Autodetect' and 'Done' is still not enabled to click. At this point, test the settings by clicking on 'Re-test'. Once mail server is contacted, option 'OAth2' will be populated into Authentication method pull down menu. Select OAth2 for both incoming and outgoing servers.
'Done' button will be enabled.
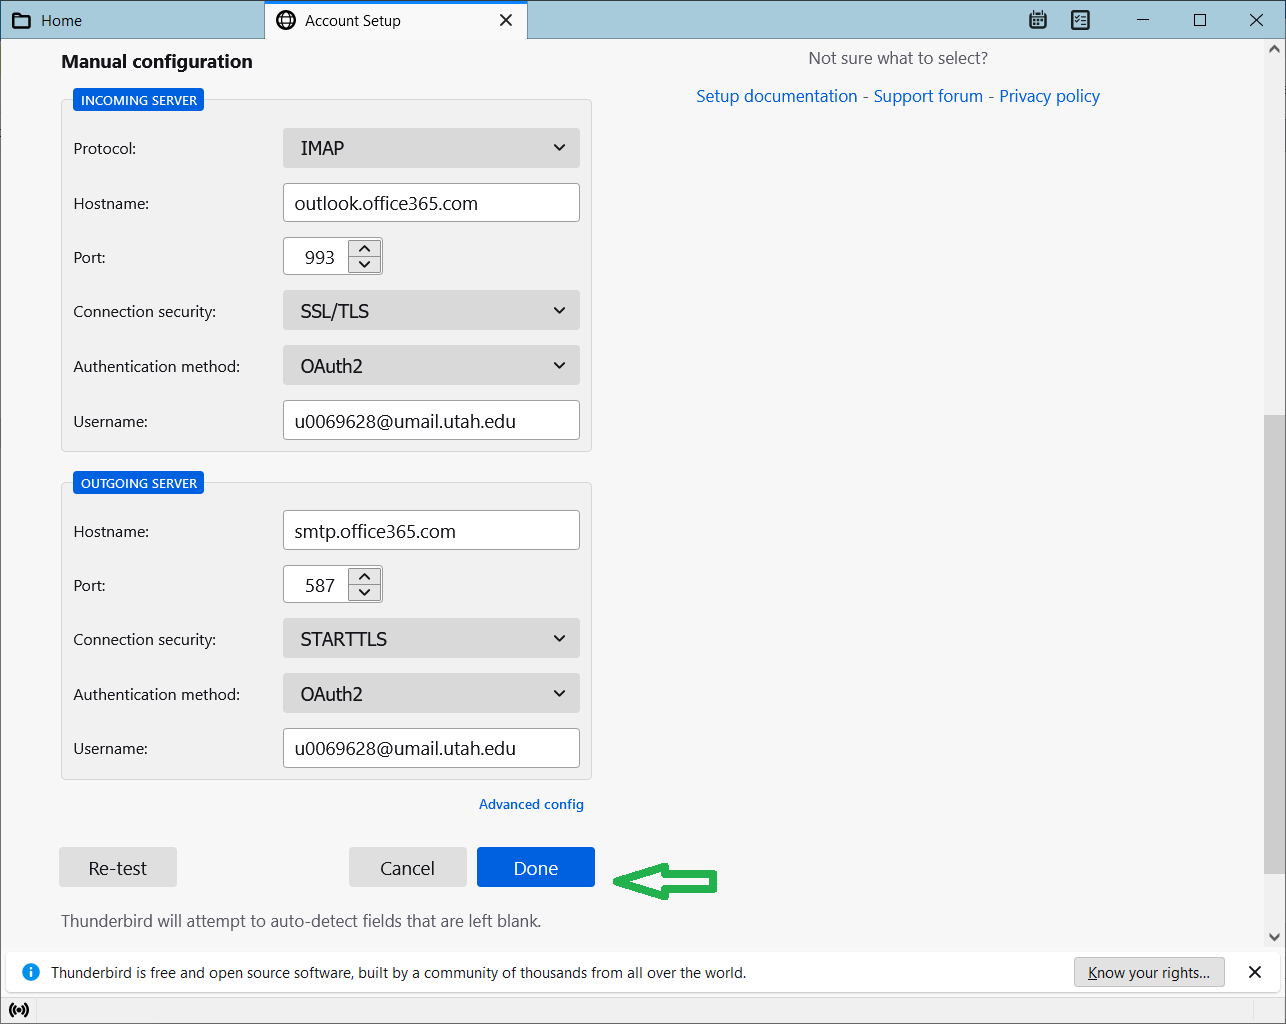
Click on 'Done'. A new windows will pop up to authenticate you with umail server.
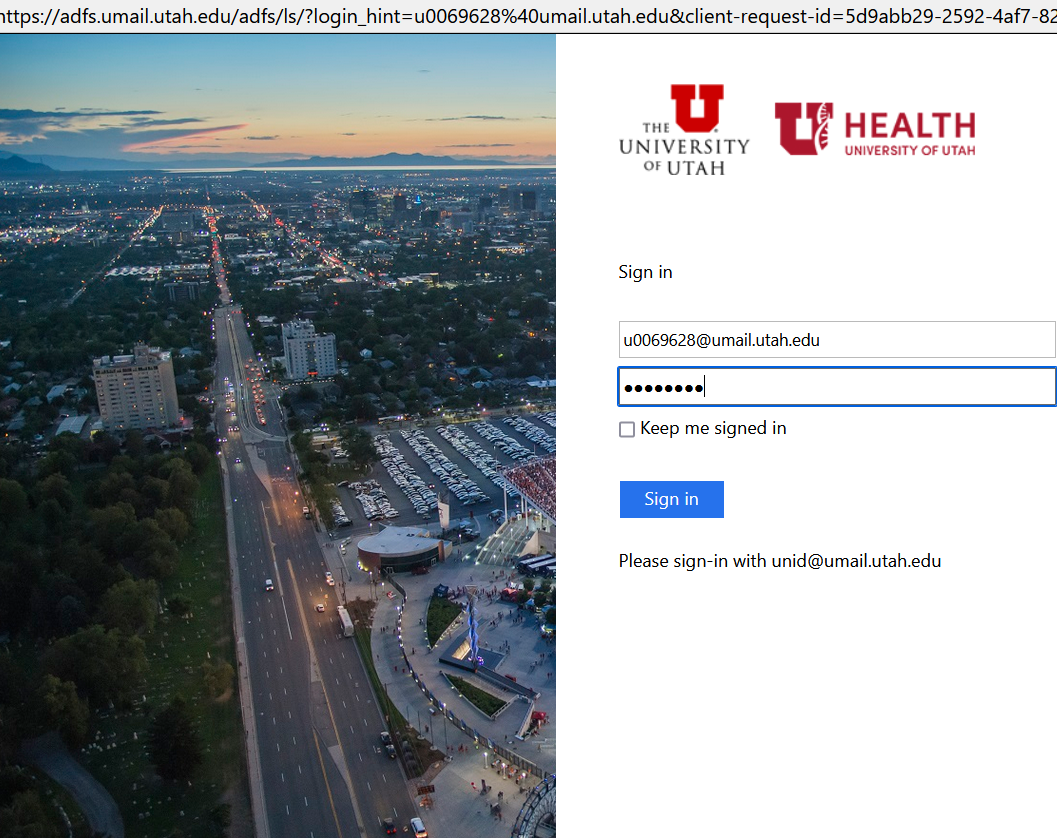
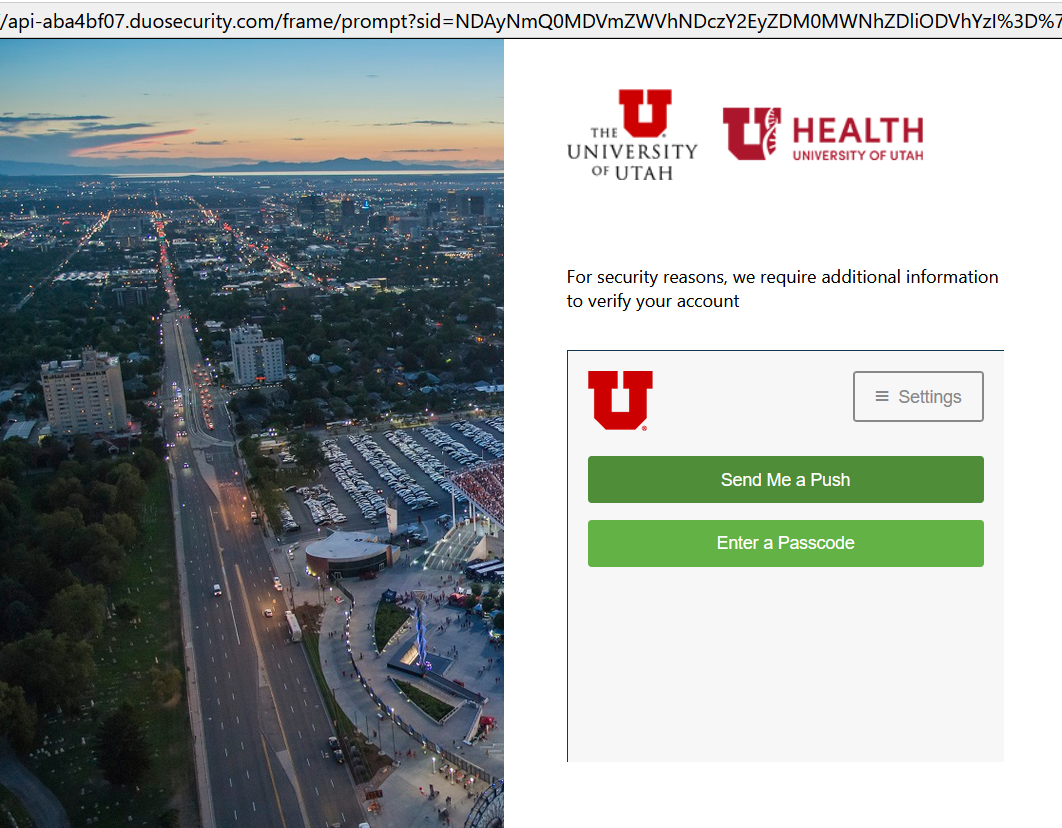
Enter values to sign in. Another window will pop up to send a push to your cell/watch for 2FA (two factor authentication).
After being authenticated, go back to Thunderbird account settings and click on 'Done' again. You can select to stay logged in on next pop up window. After all being set, final page will show up.
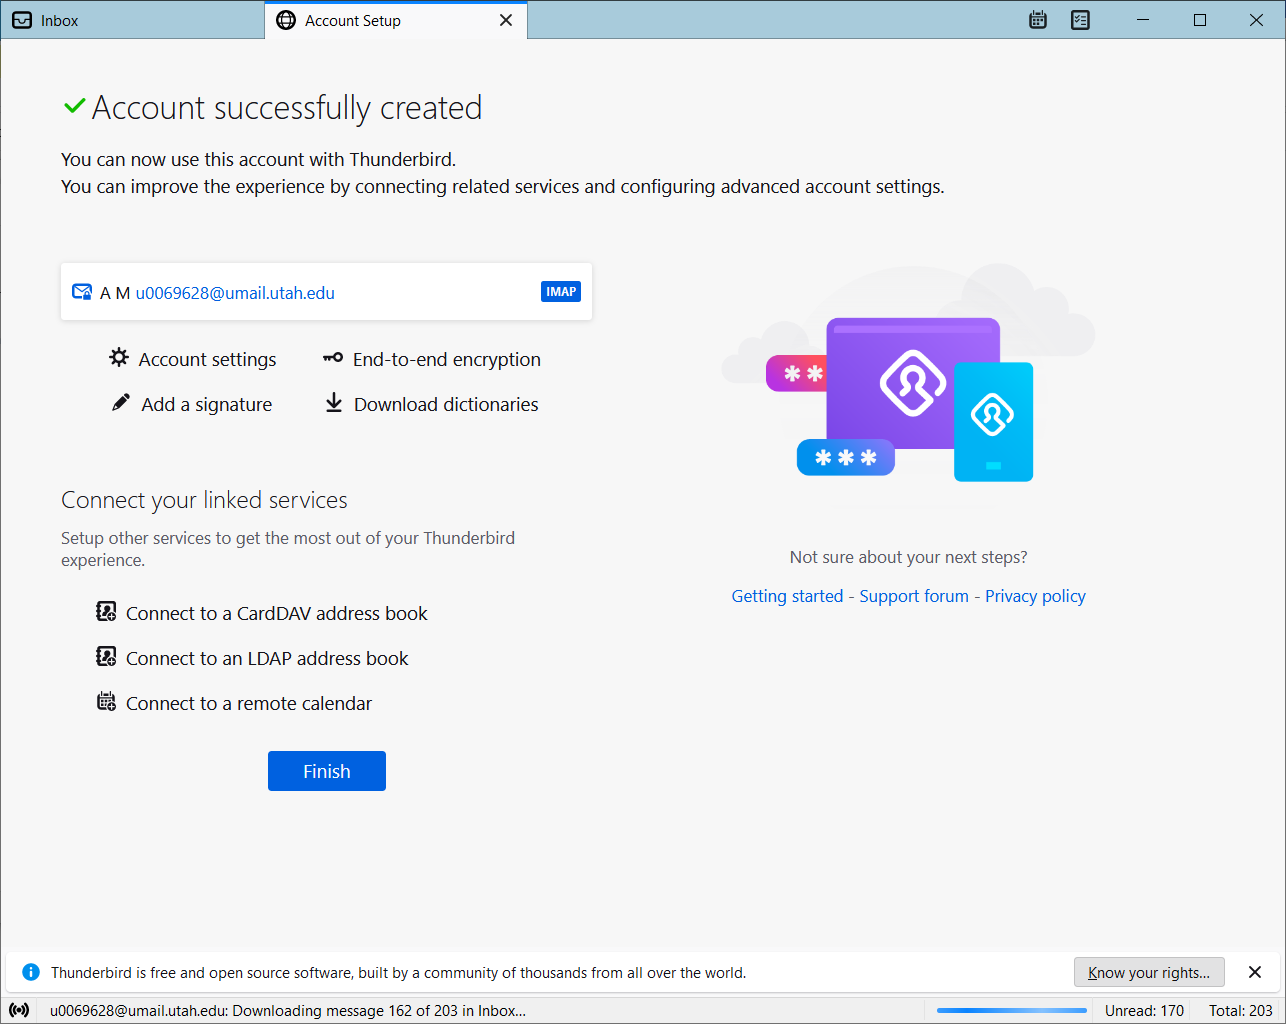
Finally, click on 'Finish.
- Microsoft Edge Browser
UIT recommends going to the https://outlook.office.com/ webpage to gain access to UMail. This will take you to the following page:

Login with the following format:
This email address is being protected from spambots. You need JavaScript enabled to view it.
& Click Next (This should take you to the following page):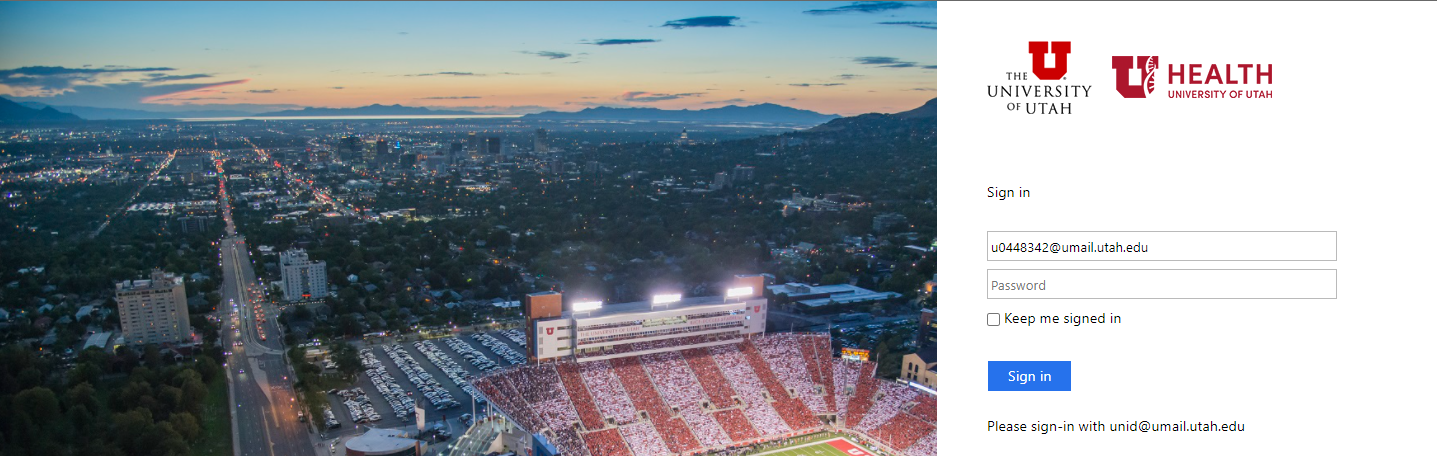
Here, enter your password and click Sign in.
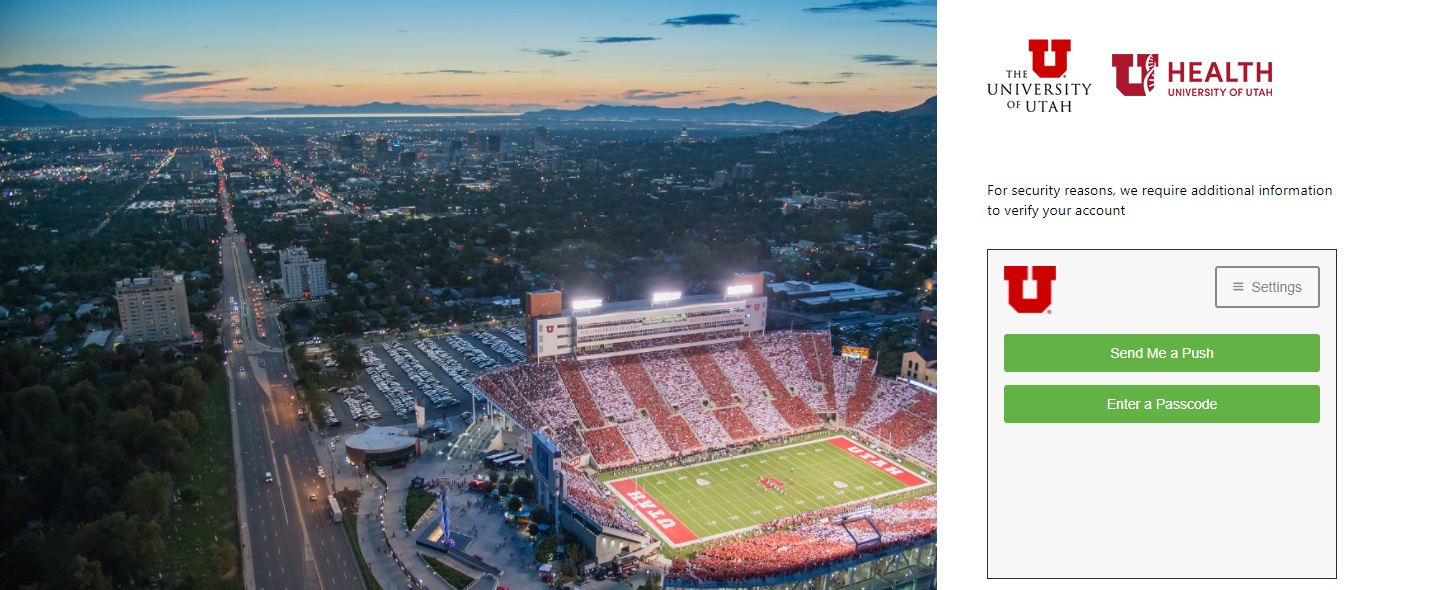
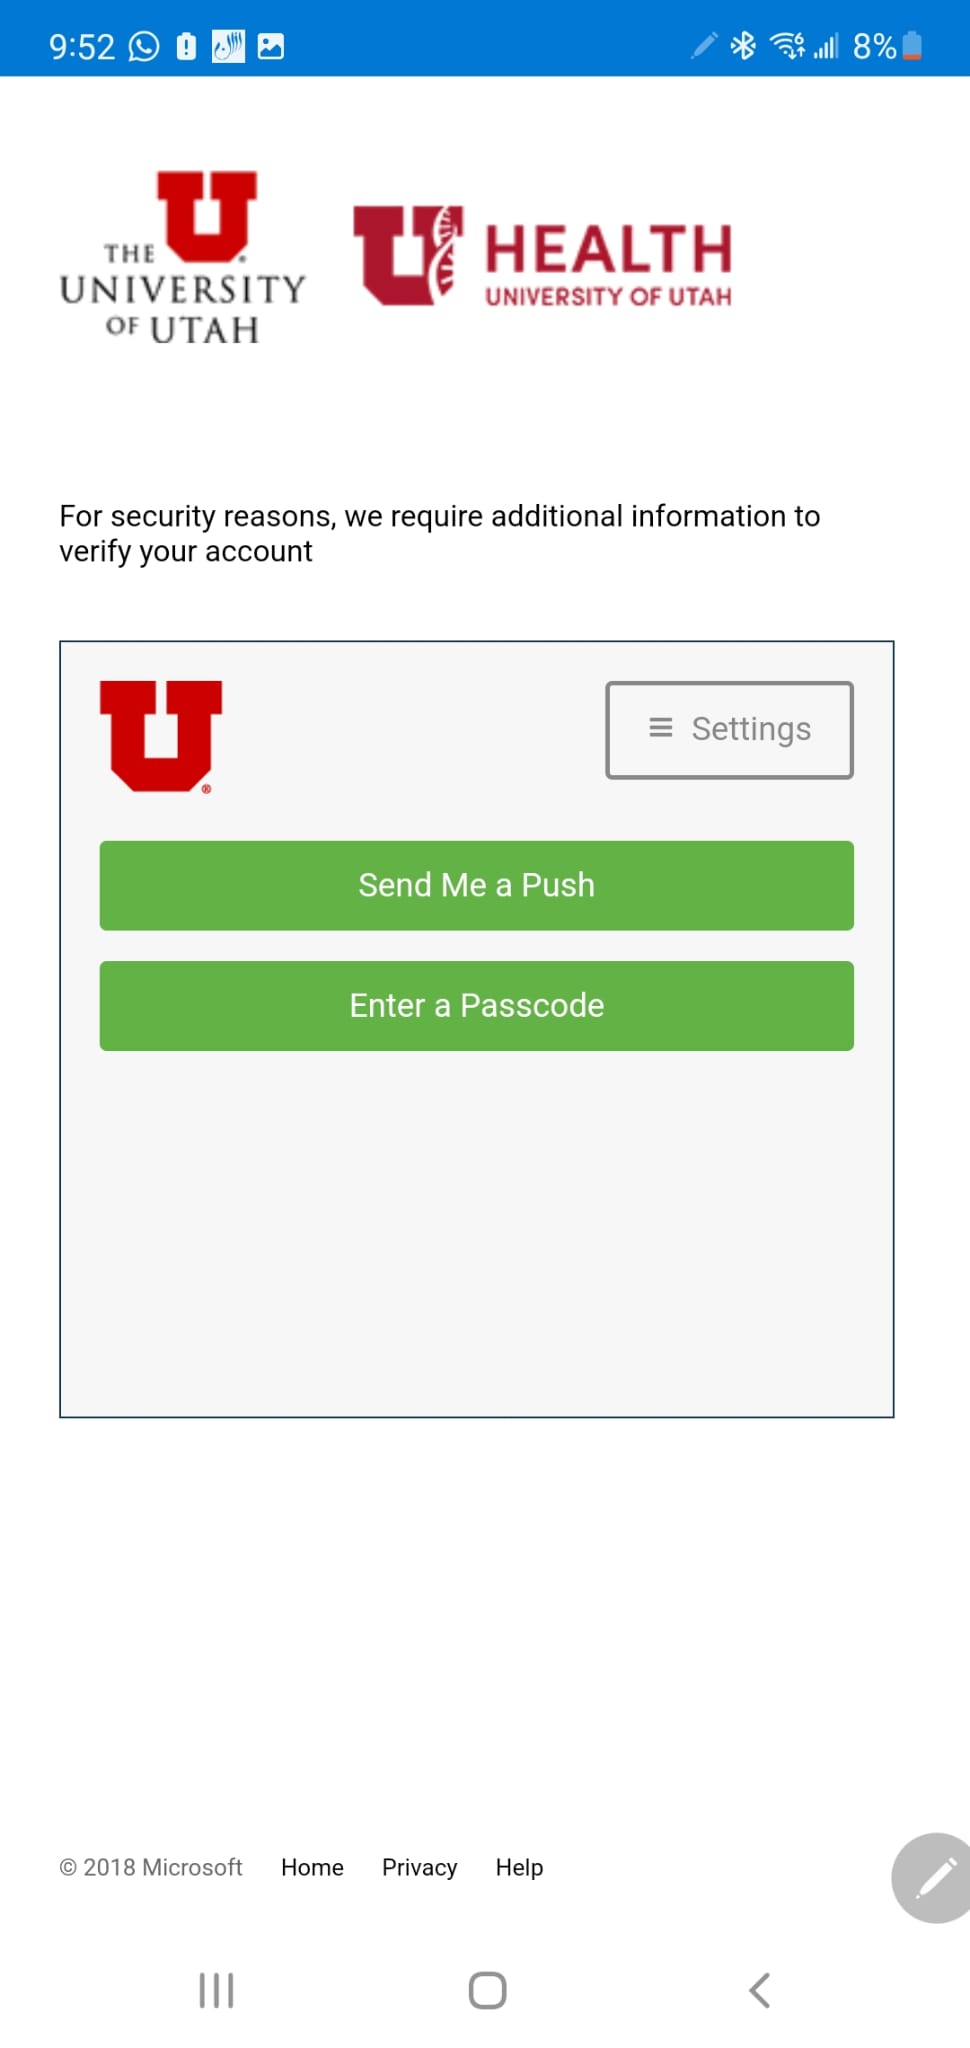
It will bring you to additional information verification method page. Select the option that works for you and Authenticate to the UMail Account.
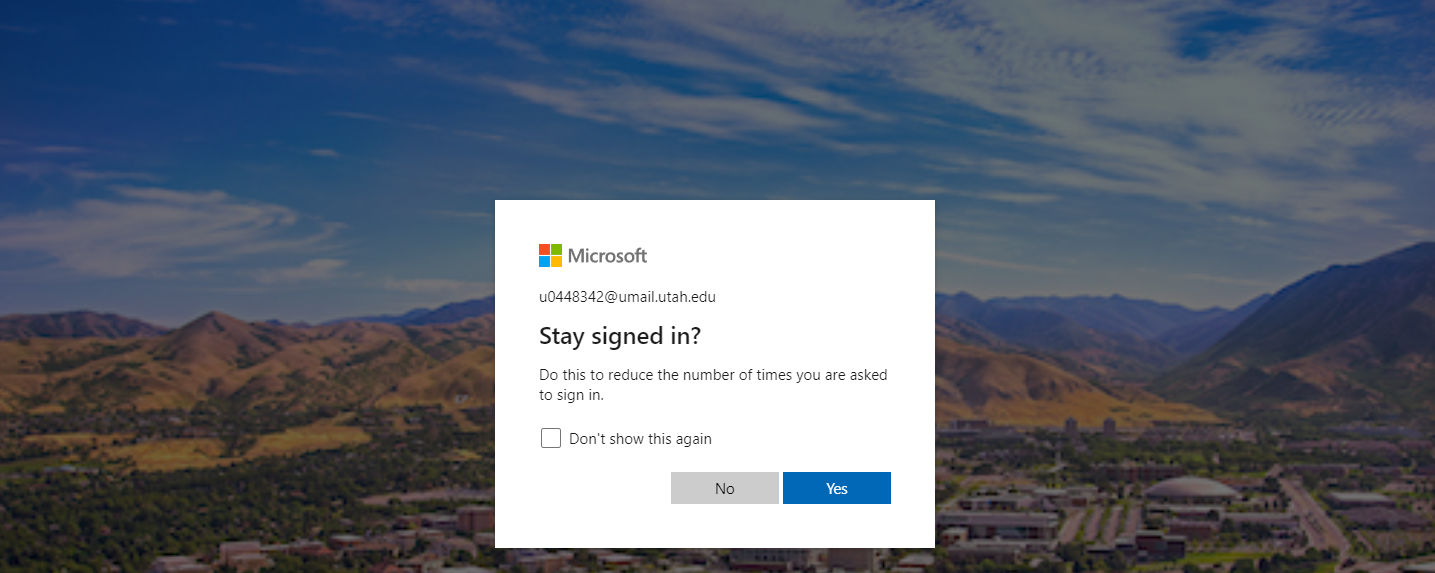
You can select the option to Stay Signed in (No or Yes).
- Outlook on Android
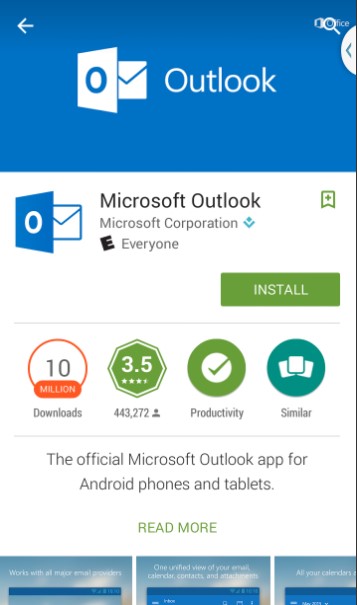
Install Outlook Application for Android. Open the Google Play (Application):

Search for Outlook and Click install:
Once installed, open this application to configure UMail into Outlook Application:
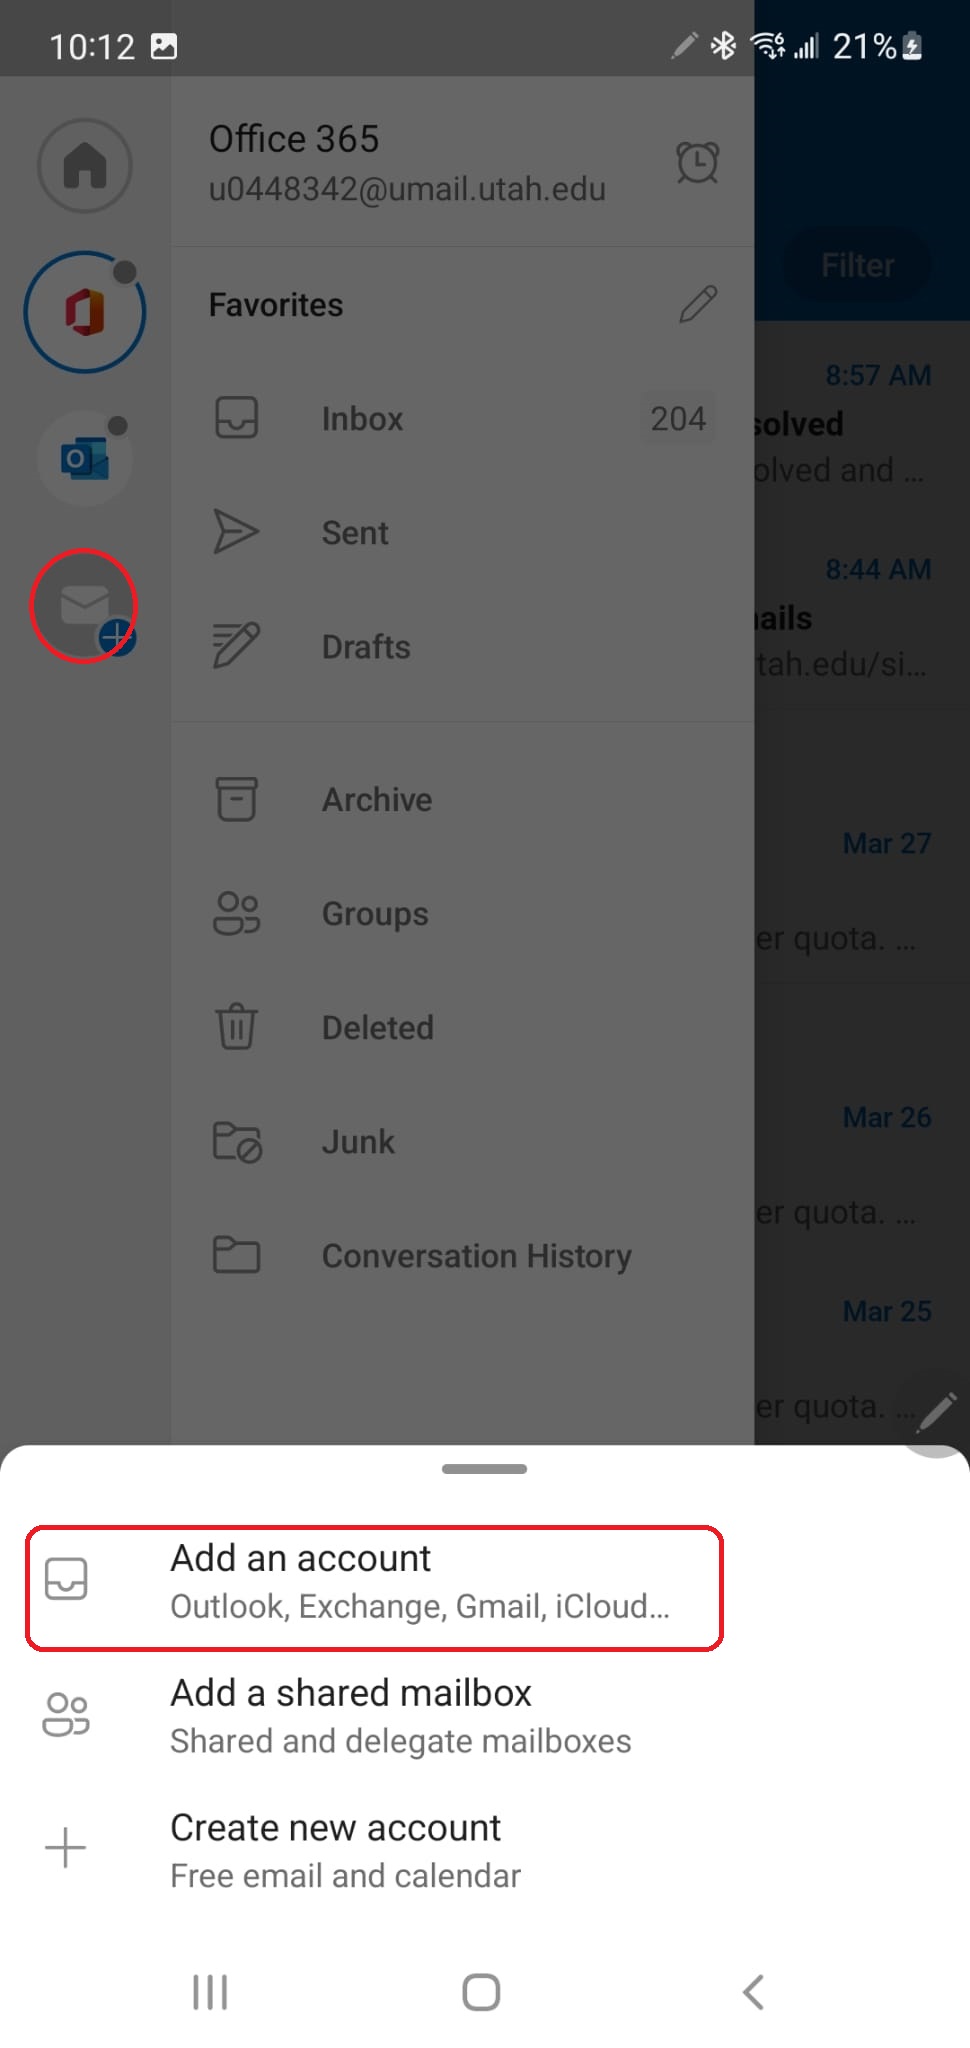
Click on Add Email Account Button on the Left Menu and click “Add an account”. It should take you to the next page where you will need to enter you UID: (This email address is being protected from spambots. You need JavaScript enabled to view it.):
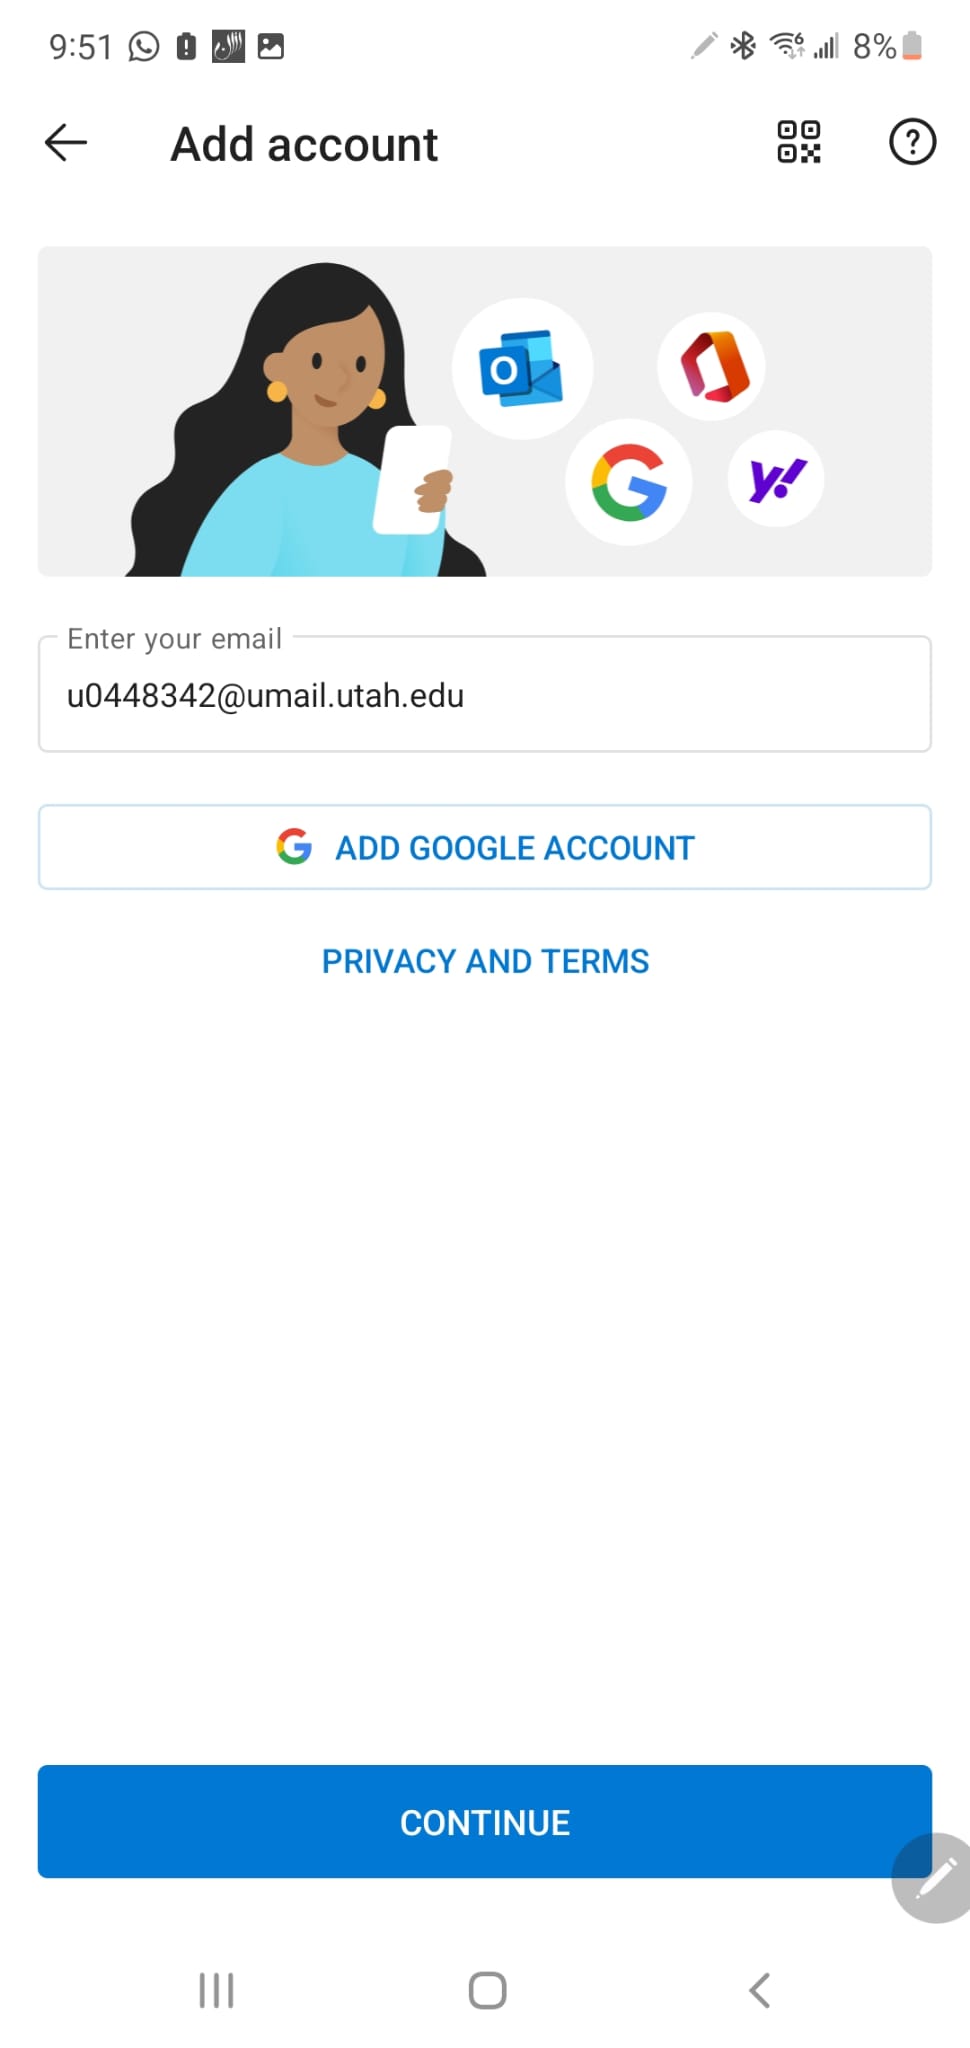
Click Continue and it should take you to the UMail Login Page:
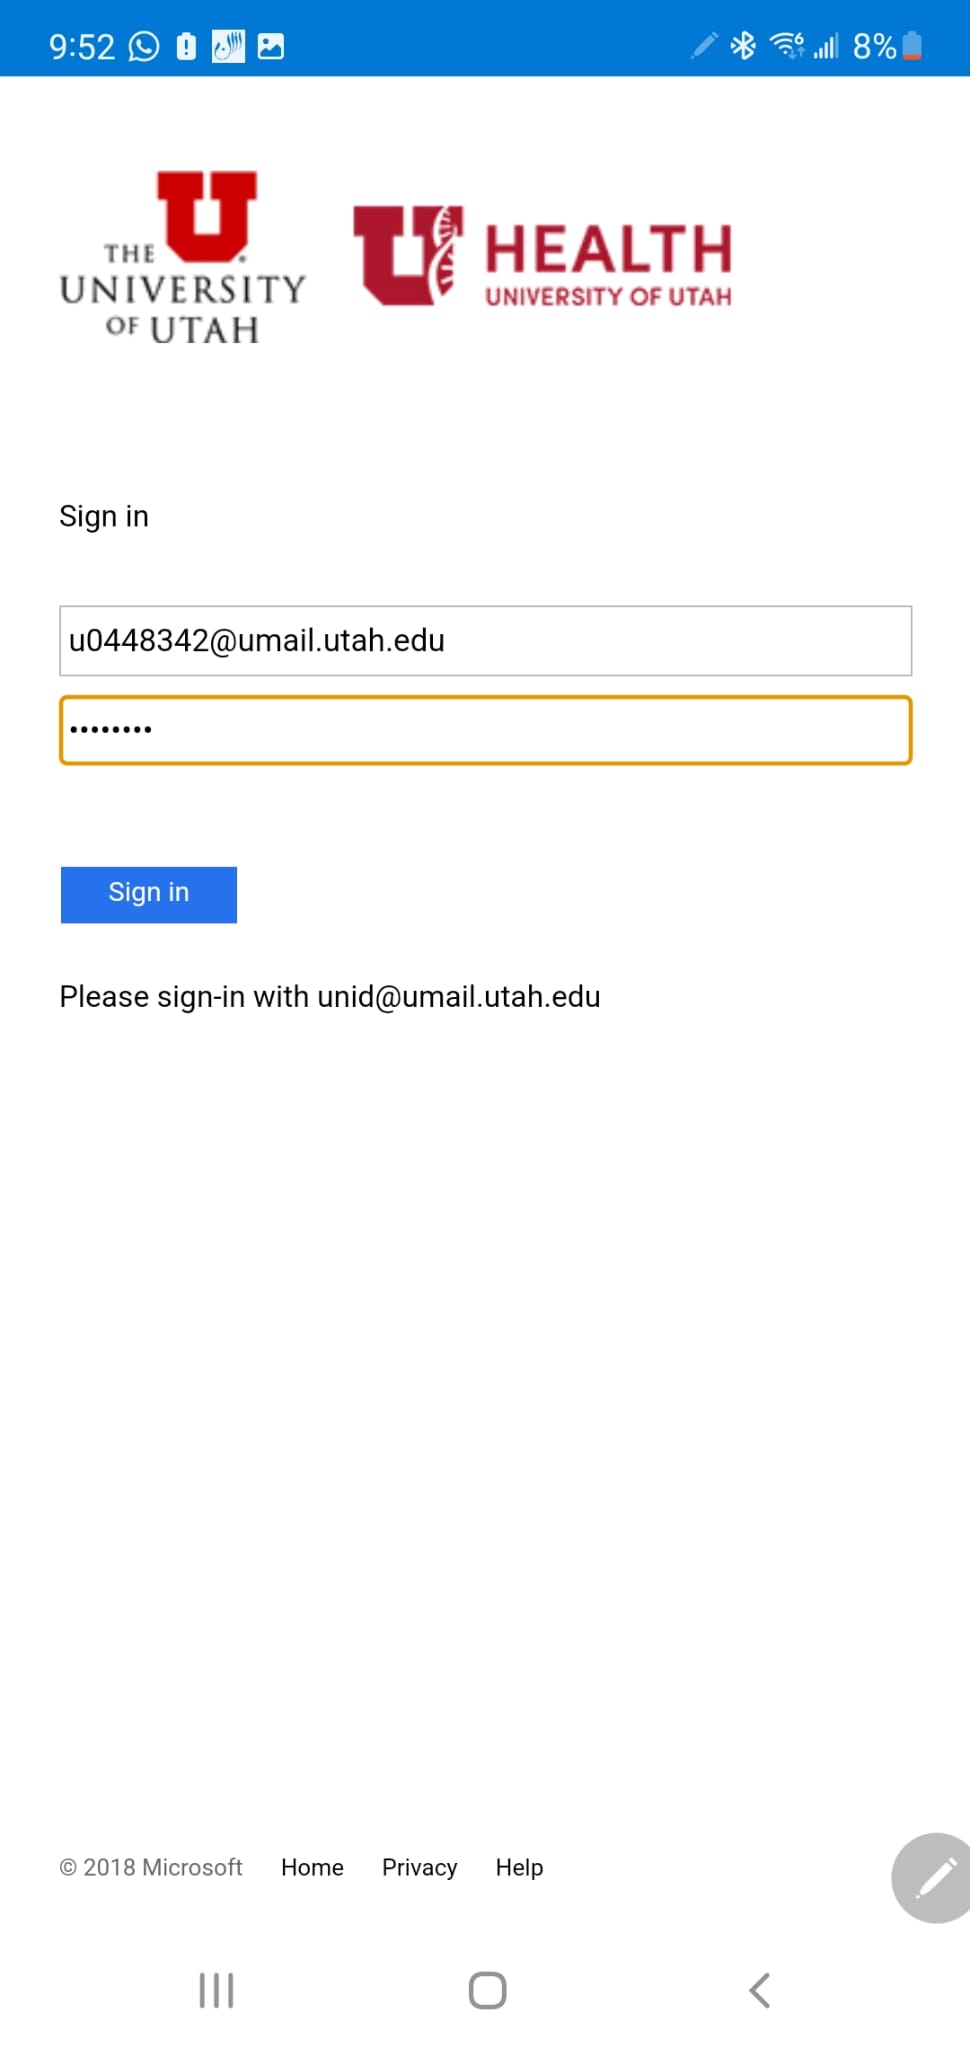
Enter your Password and Click Sign in and it should take you to additional verification page. (Select the method that works for you). This should save UMail configuration in your Outlook Application on Andriod Phone.
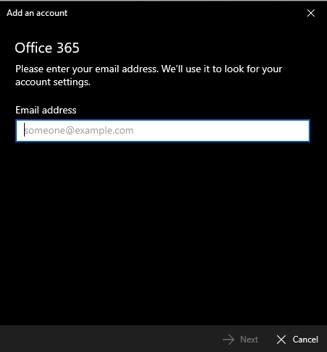
- Windows Mail
Settings -> Manage Accounts
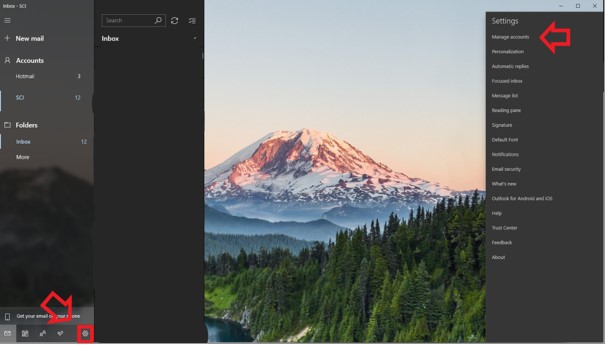
Add Account -> Office 365

Enter umail address
This email address is being protected from spambots. You need JavaScript enabled to view it.
And click Next
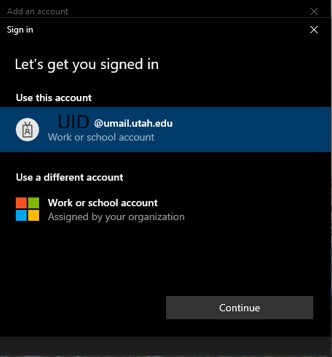
Confirm the account you are signing in to.
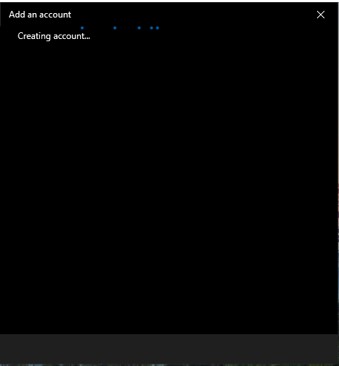
You should see the Creating account
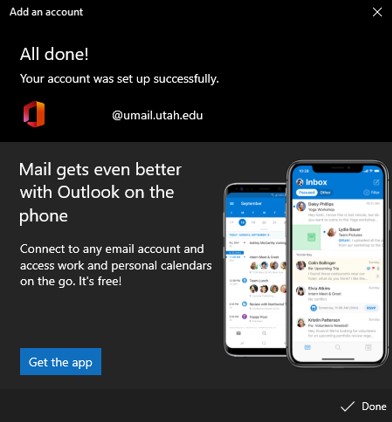
If done correctly, you will see a confirmation that it was successfully added
.
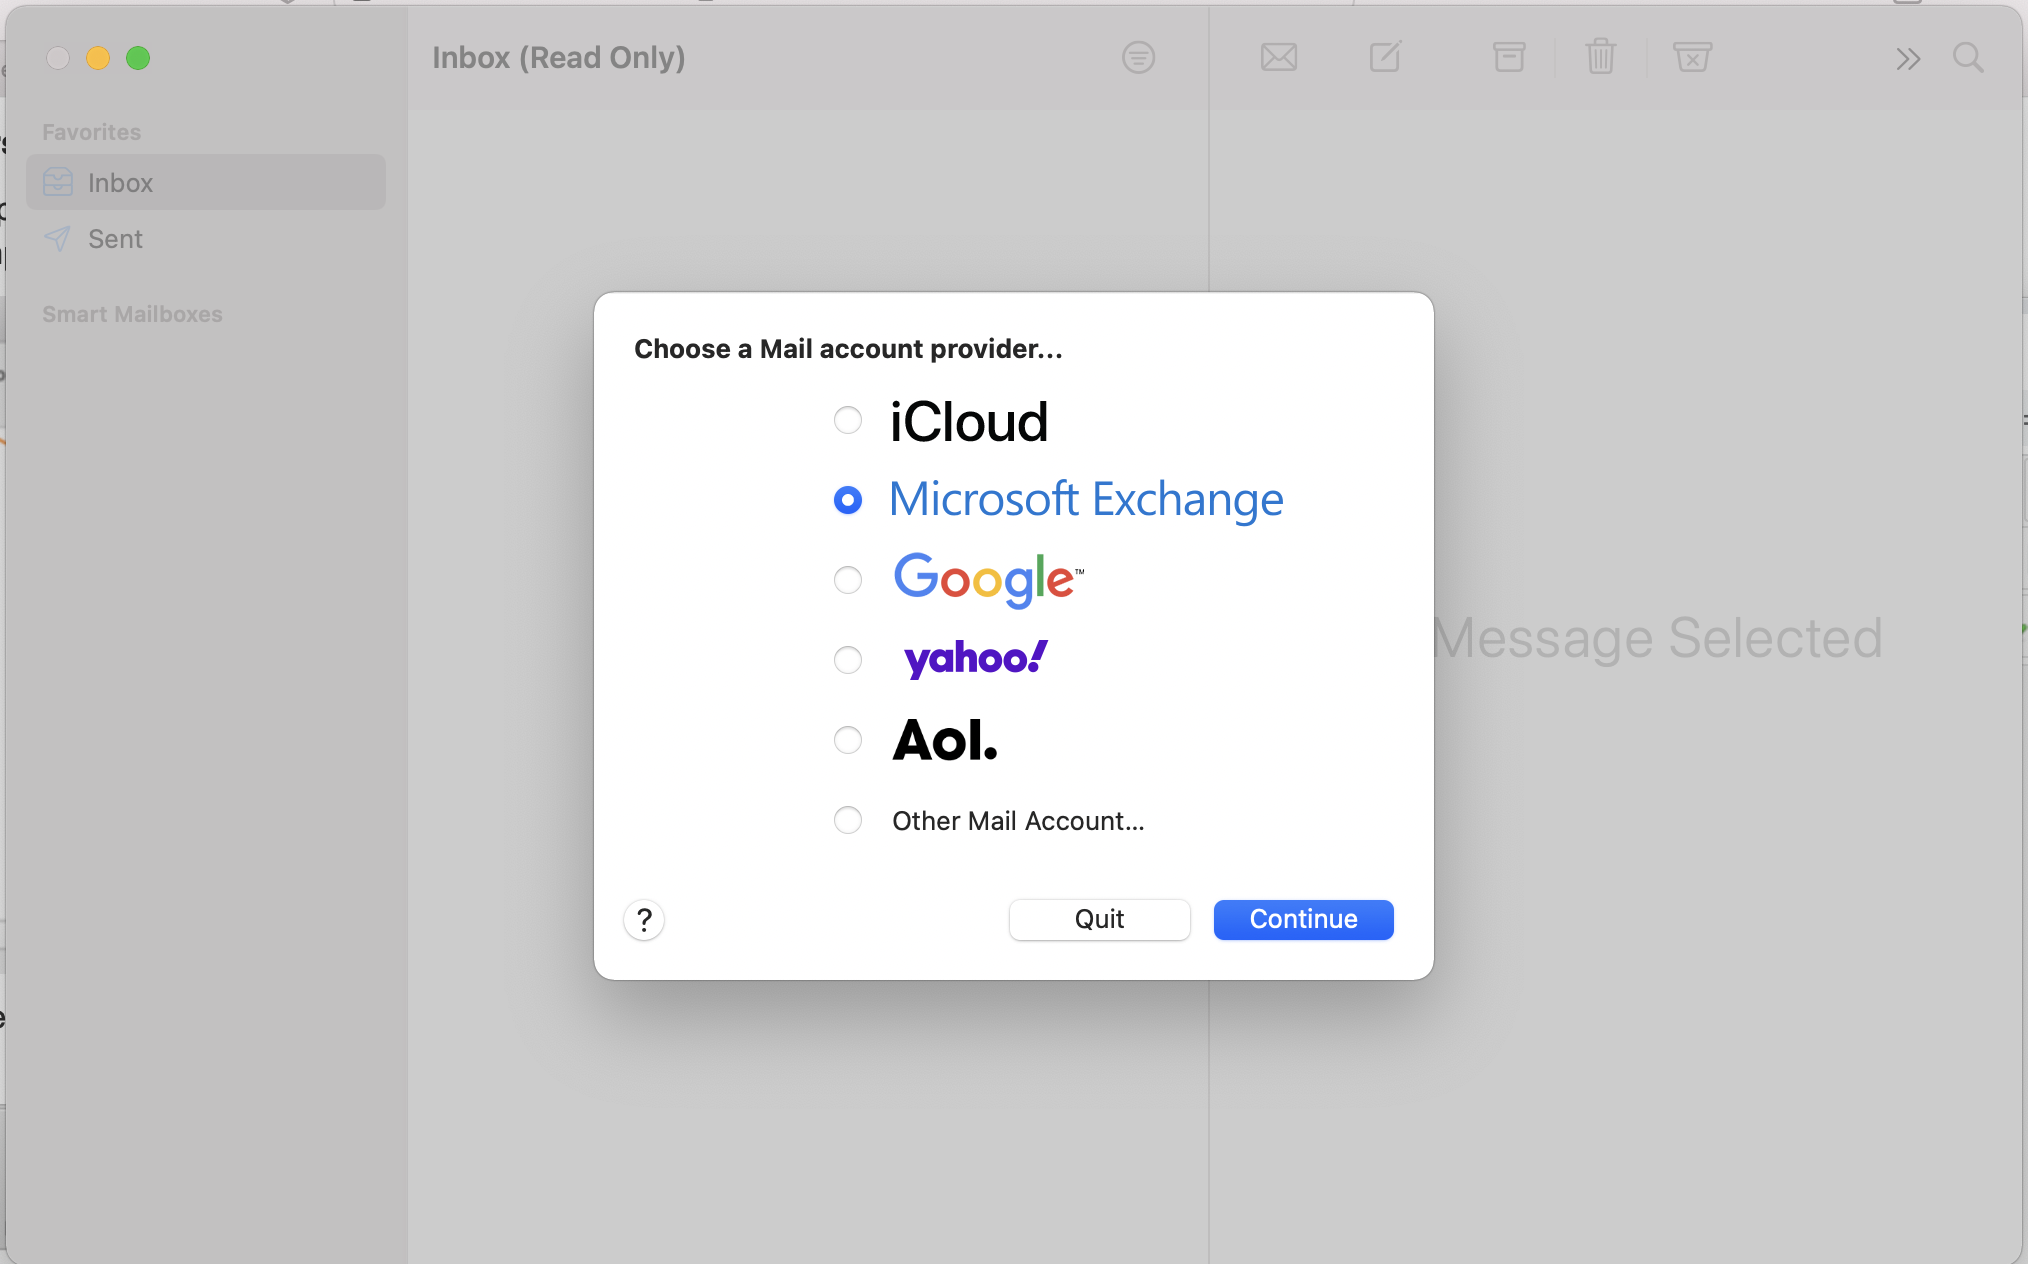
- Apple Mail
Open Apple Mail, select Microsoft Exchange and Continue:
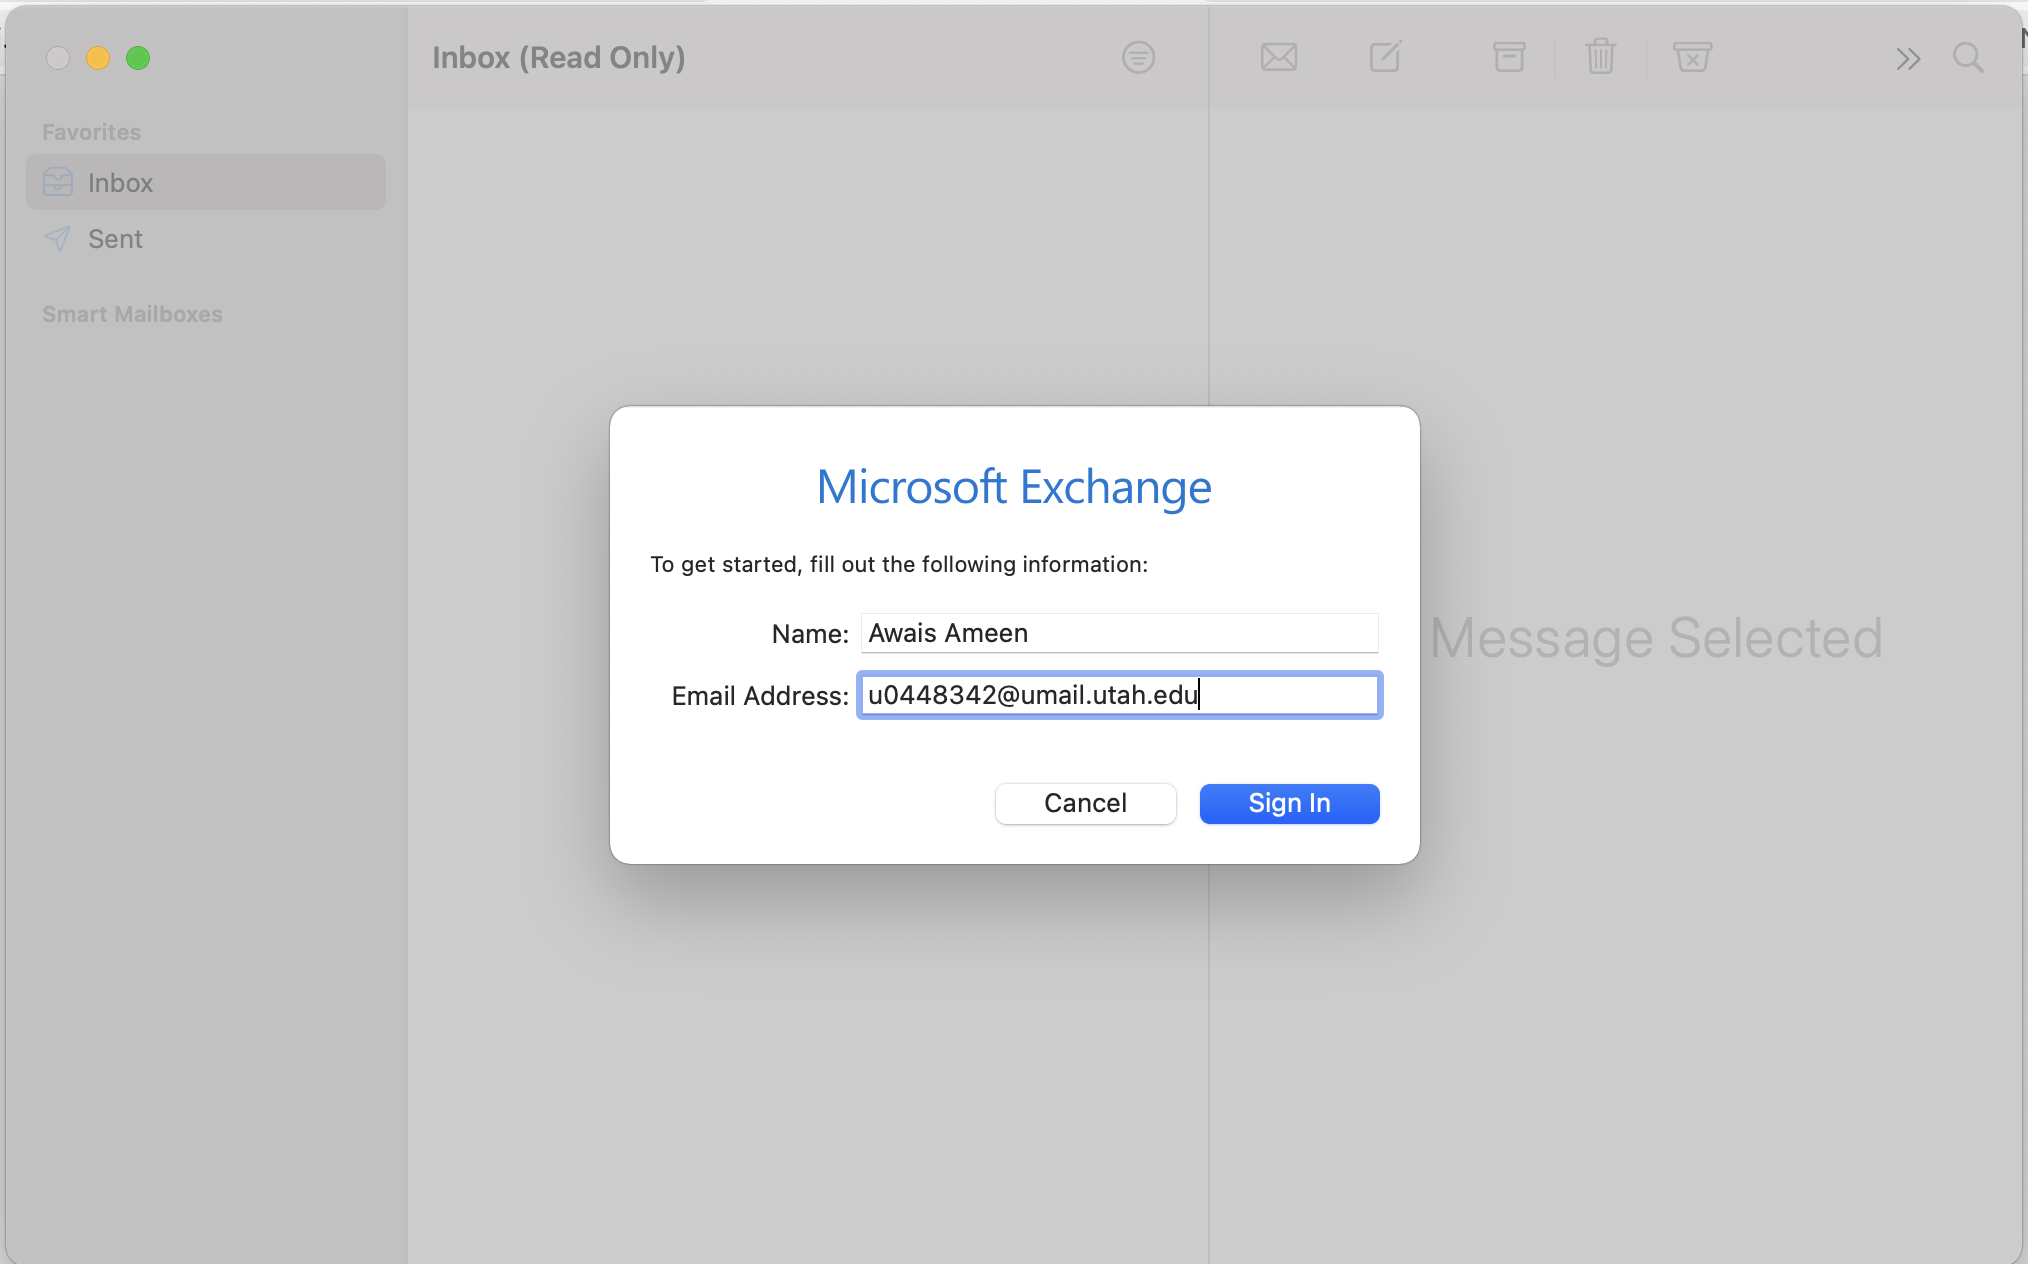
Enter Display Name along with the Email Address and click Sign In:
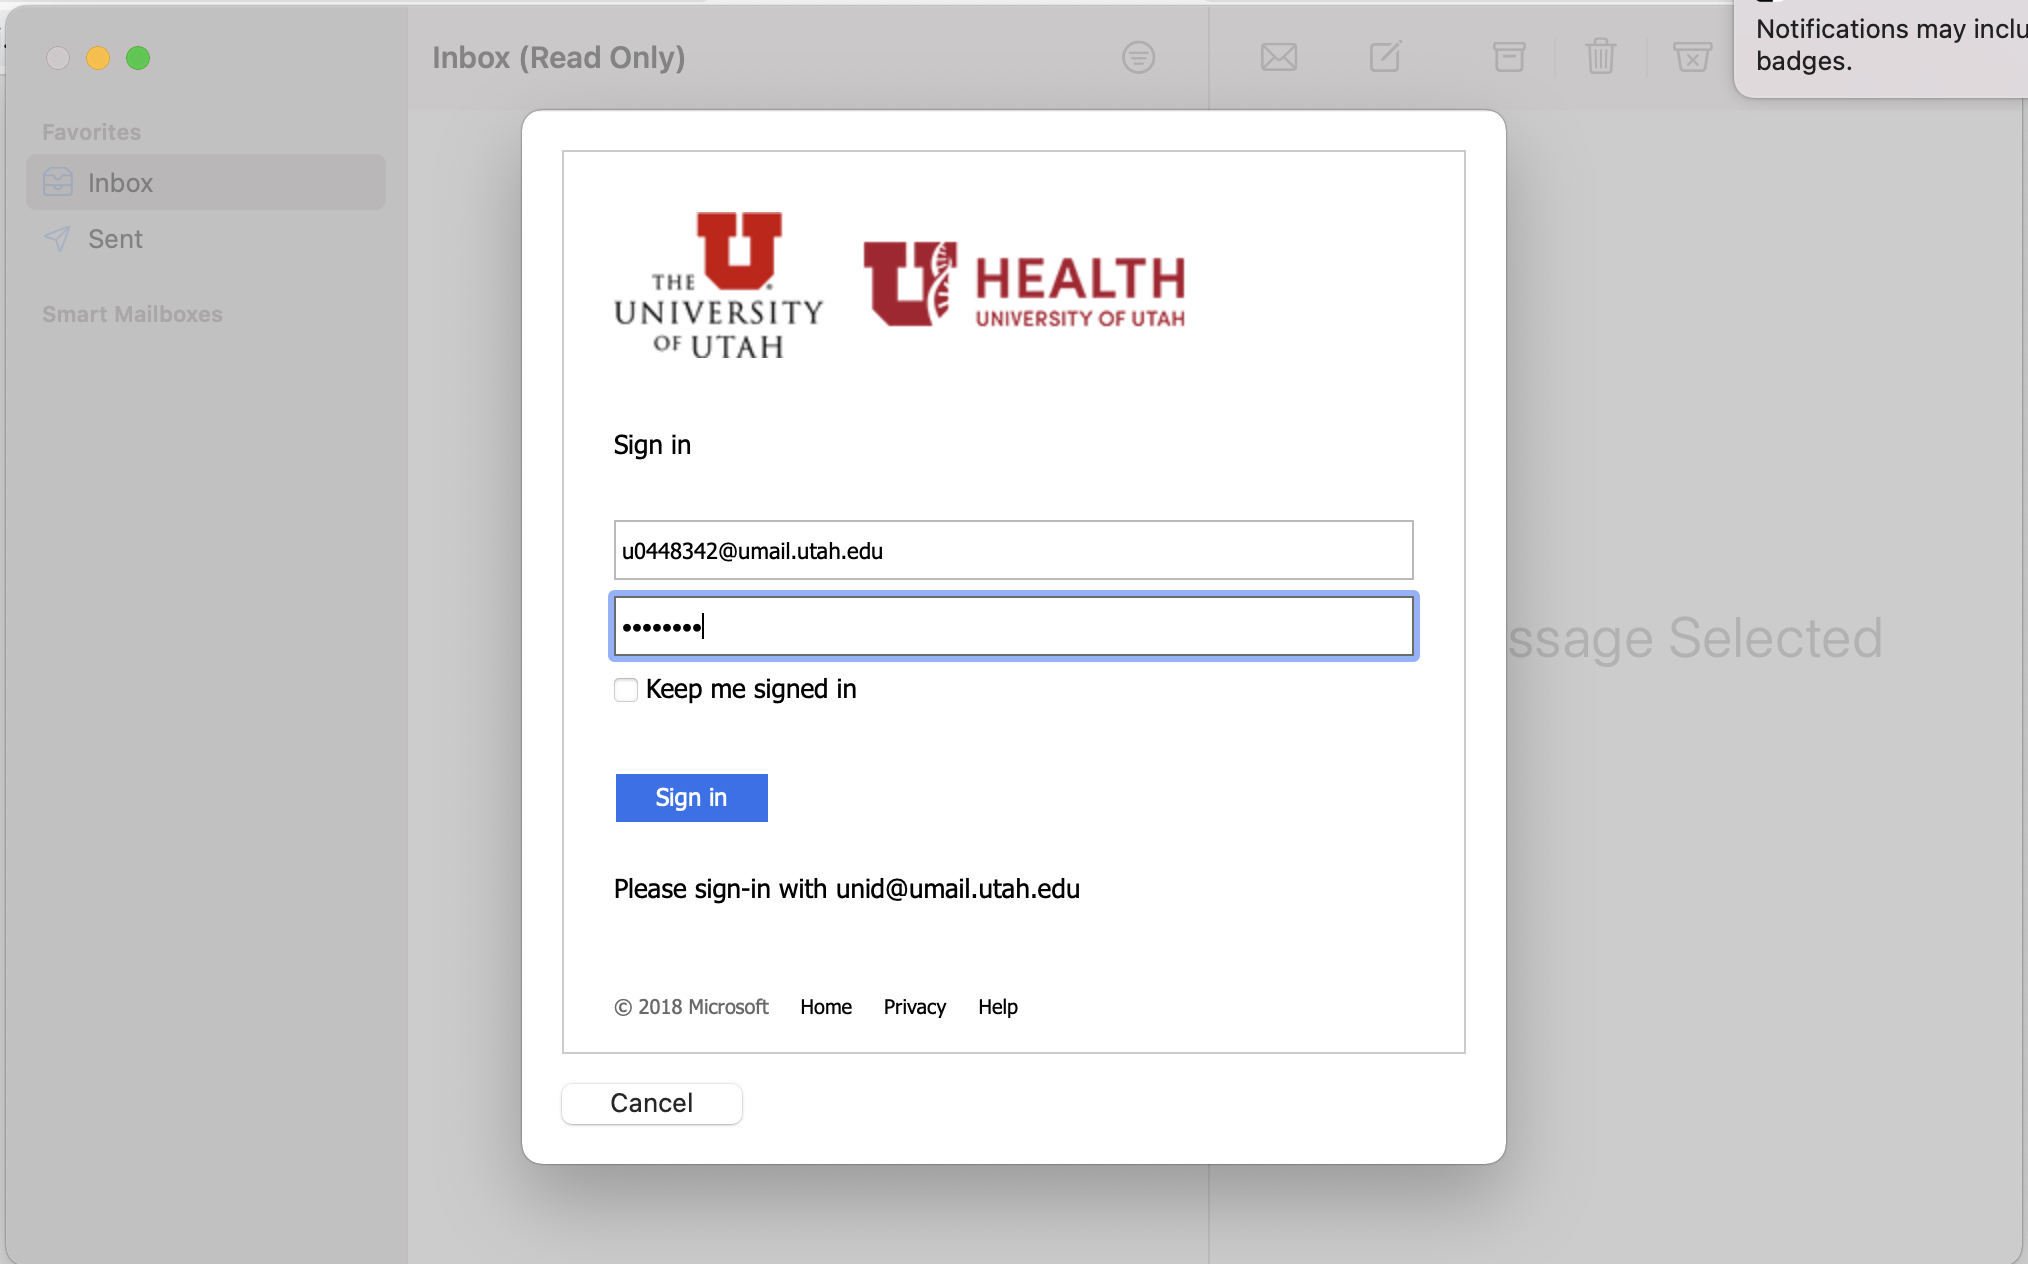
Here, you will be prompted to enter your password and click Sign In:
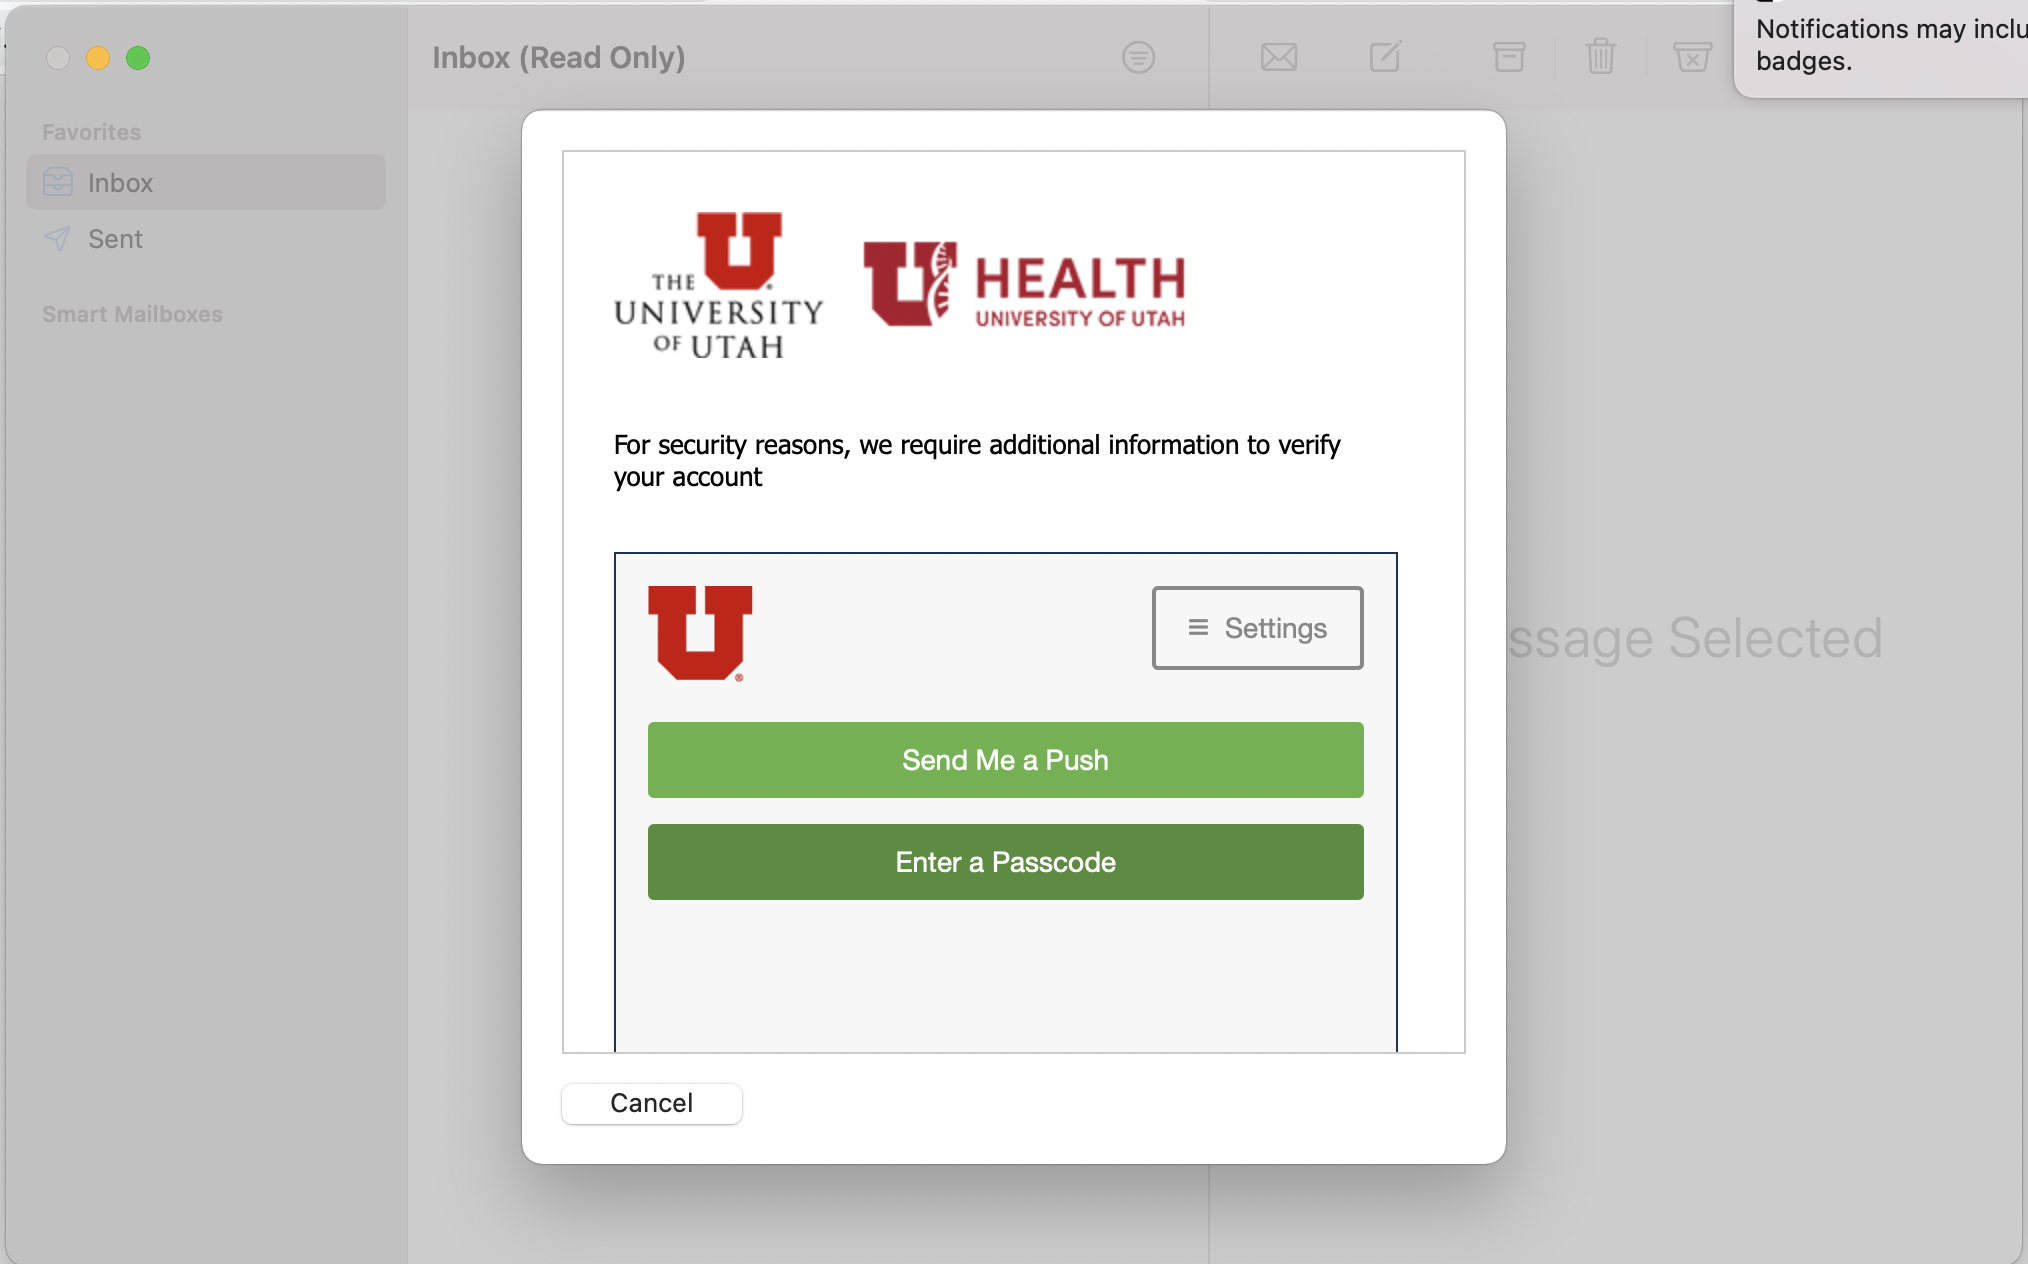
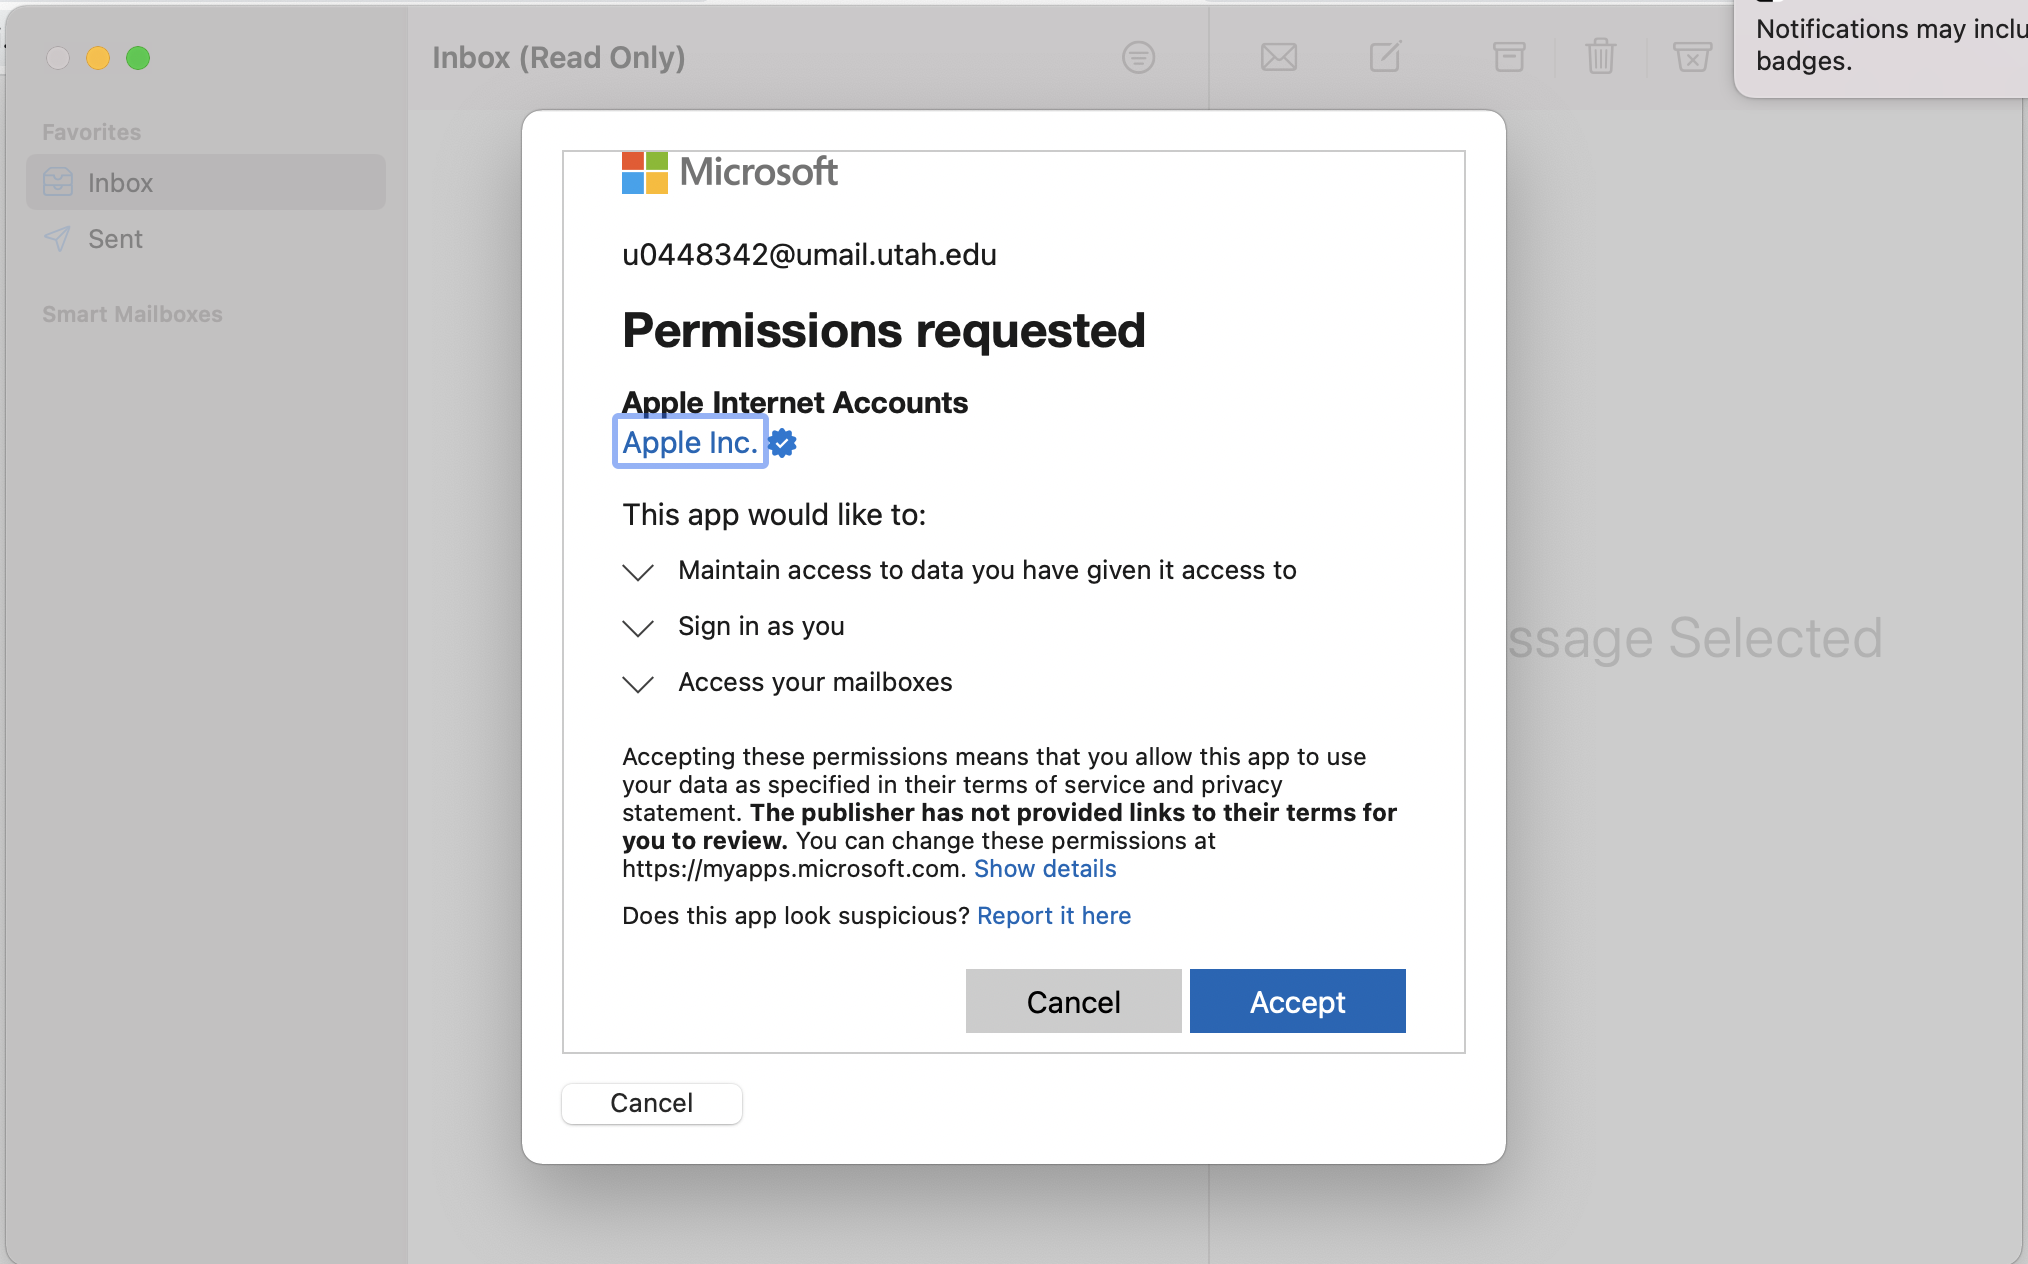
You will need to validate your identity by authenticating via Duo Security (Duo 2FA):
You will have to grant permissions to Apple to access the mailbox therefore hit Accept to continue:
Here you can select the apps you want to use this account for and Done.
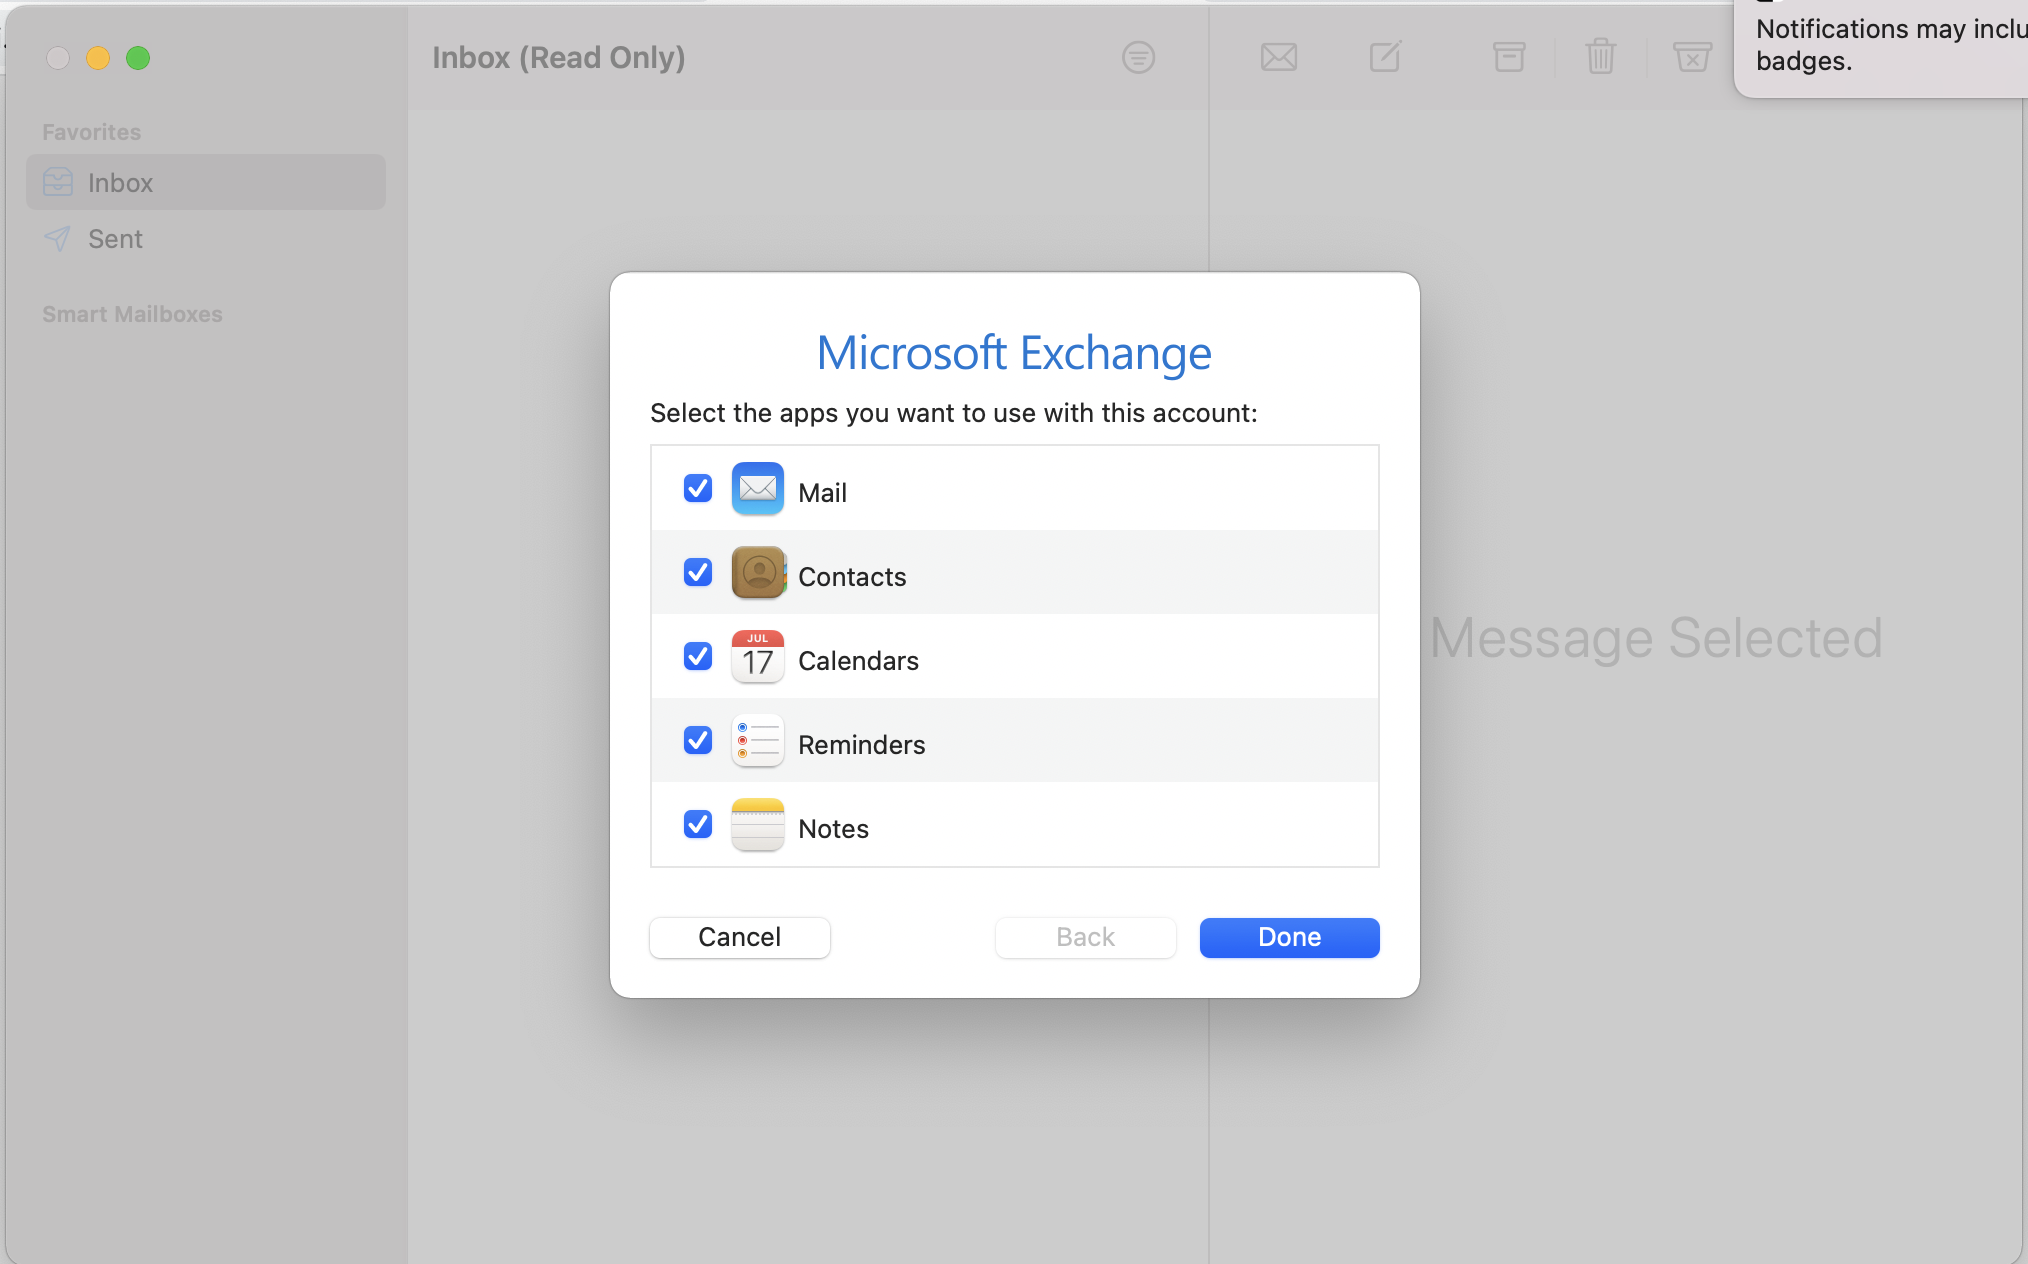
Once completed, the Apple Mail should start syncronizing your Mail box to your Apple Mail Application.